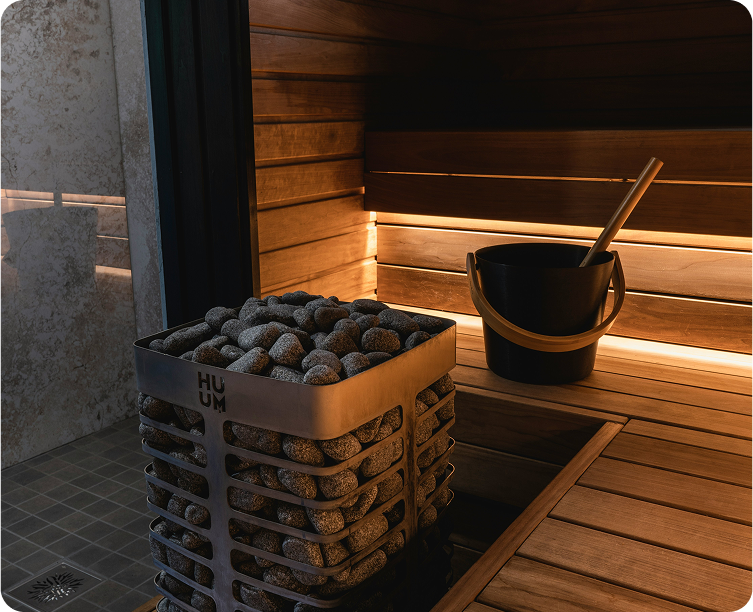
If your sauna is not getting hot enough, the cause is usually one of three things: the heater is not delivering its full rated output, the cabin is losing more heat than the system was designed to replace, or the controls are cycling based on a temperature that does not represent the bathing zone. A new installation that stalls near 120°F to 150°F deserves particular attention because a heater can power on, click, illuminate its controller, and warm partially even when one or more heating elements are not properly connected or energized.
Other common causes include an undersized heater, incorrect supply voltage, excessive glass area, misplaced temperature sensor, supply air cooling the sensor, poor ventilation layout, a leaking door, tightly packed or deteriorated stones, wet construction, and severe outdoor conditions. The correct diagnosis depends on whether the problem began on day one, appeared suddenly, developed gradually, or occurs only in cold weather.
This guide provides a safe troubleshooting sequence for Toule or Harvia 6 kW heaters and HUUM DROP 6 kW or 9 kW systems with the Wi-Fi UKU controller used in applicable Rodeo Wellness saunas. Homeowners can document symptoms and inspect accessible non-electrical conditions, but energized testing, terminal correction, element replacement, breaker work, and control-panel diagnosis belong to a licensed electrician or authorized service professional using the exact regional wiring diagram.
Quick Diagnosis
Begin by comparing actual behavior with a known baseline. A correctly sized residential electric sauna often reaches a traditional upper-bench temperature in roughly 30 to 60 minutes in moderate conditions, although cold weather, panoramic glass, large stone mass, or a high target can extend that interval. If the room keeps climbing slowly, the issue may be load or heat loss. If it plateaus early, cycles off prematurely, or never improves after extended operation, prioritize controls, sensor placement, partial electrical output, and heater sizing.
Do not start by moving the sensor, closing all vents, removing stones, increasing breaker size, or altering wiring. Those actions can hide the symptom while creating overheat, shock, fire, or equipment-damage risk. Record the heater model, voltage, controller behavior, error codes, outdoor conditions, elapsed time, and temperatures at both the controller and upper bench, then follow a controlled sequence.
|
Observed Symptom
|
Likely Diagnostic Area
|
Appropriate Next Step
|
| Controller works but room remains cool |
Partial element power, wrong voltage, control output, heater sizing |
Stop guessing and have a licensed electrician verify actual output |
| Heater shuts off while benches feel cool |
Sensor too hot, wrong sensor position, control setting, airflow |
Compare installation with the exact model manual |
| Heat-up is gradually becoming slower |
Settled stones, failed element, air leakage, moisture |
Inspect maintenance items and arrange electrical testing |
| Only weak in winter |
Cold-start load, wind, door gaps, model suitability |
Establish seasonal baseline and review cold-weather limitations |
| Top is hot but feet are cold |
Bench height, ventilation, stratification |
Assess room layout rather than simply raising the setpoint |
| Steam is weak but air is hot |
Stone readiness, packing, stone condition, water rate |
Allow heat soak and service stones as instructed |
Start with Safety and Stop-Use Signs
Most low-temperature complaints are not emergencies, but some symptoms require the heater to be switched off and professionally inspected before further use. Repeated breaker trips, burning odors after normal first-use curing, sparks, buzzing at terminals, discoloration, melted insulation, visible element damage, water in electrical compartments, recurring overheat trips, or unstable controller behavior are not performance quirks.
Do not remove electrical covers, reach through stones, probe live terminals, or measure voltage unless you are qualified and authorized to service the equipment. Sauna heaters operate at dangerous voltage and high current. Even after switching off the controller, parts may remain energized unless the correct disconnect and breaker are opened and verified.
Keep the cabin clear during any test. Towels, buckets, cleaning products, footwear, or wood stored near the heater can obstruct airflow or ignite. Remote-start systems require the approved door-safety arrangement and a cabin confirmed ready for operation.
Shut Down Immediately
Stop operation for smoke, arcing, an electrical odor, glowing connections outside normal heating elements, repeatedly tripping protection, or visible damage. Record the error display and conditions without opening the unit. Contact the installer, licensed electrician, dealer, or manufacturer support.
Do Not Bypass the High Limit
An overheat protector may trip because of blocked airflow, incorrect stones, sensor issues, cold-sensitive mechanical controls, or an equipment fault. Resetting it repeatedly without correcting the cause removes an important warning. Follow the exact manual, and use qualified service where the reset requires access inside the heater.
Preserve the Evidence
Photograph the installed heater, model label, controller, sensor, vents, stone arrangement, door, and visible wiring route without opening enclosures. Note when the problem began and whether it followed installation, electrical work, a storm, stone maintenance, or a cabin modification. Good documentation shortens service time.
Call a professional before further operation when any of these conditions appears:
-
Electrical distress: Breaker trips, arcing, unusual buzzing, melted components, burning odor, or discolored terminals are present.
-
Repeated protection events: The overheat limit or controller error returns after the approved reset procedure.
-
Water exposure: Leaks, flooding, condensation, or excessive water may have reached the heater, controller, sensor, or junctions.
-
Physical element damage: A heating element appears deformed, cracked, displaced, or in contact with prohibited components.
-
Uncertain installation: Model, voltage, wiring diagram, breaker, conductor, controller, or regional configuration cannot be confirmed.
Improperly Connected or Partially Energized Heating Elements
Your suggested cause is important: the heating elements may not be connected properly. Many electric sauna heaters use multiple elements. If a supply leg, element lead, terminal, contactor output, control connection, or field-installed jumper is incorrect, the heater may deliver only part of its rated power. The controller can still illuminate and some elements can still become hot, creating the impression that the system works but is simply weak.
A nominal 6 kW heater operating on only part of its element bank may behave like a much smaller unit. It warms the immediate stone area, raises cabin temperature slowly, and may never overcome glass and winter losses. A 9 kW system with partial output can produce the same misleading pattern. Visual observation alone is not a reliable confirmation because cycling, stone coverage, and ambient light can make element glow difficult to compare.
The correct verification is model-specific electrical testing by a licensed electrician. The electrician should use the supplied wiring diagram to confirm supply voltage under load, current on the required conductors, output to each heater circuit, terminal torque or connection condition where specified, controller or contactor operation, continuity with power isolated, grounding, and the correct breaker and conductor arrangement. Homeowners should not perform live amp or voltage testing.
Why the Controller Can Look Normal
A controller primarily confirms that its logic has power and is calling for heat. It may not independently prove that every element is receiving the correct voltage and current. A contactor can click while one output path remains open, an element can fail while others heat, or a supply configuration can be wrong even though the display shows no obvious error.
New Installation Pattern
If the sauna has never reached expected temperature, prioritize installation and commissioning. Compare the nameplate with the ordered heater, actual supply voltage, regional wiring diagram, controller configuration, sensor, room calculation, and electrician's test results. Do not accept a statement that all elements feel warm as proof of full rated output.
Sudden Partial-Heat Pattern
If a previously reliable sauna suddenly heats slowly, an element, connection, relay, contactor, or supply component may have failed. The remaining elements can conceal the fault. A qualified technician can compare actual electrical output with the nameplate and identify whether the loss is in the heater, controller, or supply.
Loose or Incorrect Connections
Loose or incorrectly landed conductors can create resistance, heat, arcing, and fire risk rather than simply reducing performance. This is why terminal inspection and correction should not be reduced to a do-it-yourself tightening exercise. The system must be de-energized, verified, assessed for damage, and serviced according to the manufacturer and electrical code.
Voltage Supply and Electrical Capacity
A heater's model name does not guarantee the same output at every voltage. HUUM's North American DROP documentation lists different output and room-volume information for 240 V and 208 V supplies. A model selected under 240 V assumptions can deliver less power on a properly connected 208 V system unless the specific configuration accounts for it. That difference directly affects warm-up and cold-weather reserve.
The electrician should also confirm that the dwelling service, feeder or branch circuit, breaker, conductor size, disconnect, contactor, and control system match the equipment. Long conductors do not automatically make a sauna fail, but voltage at the heater under load matters. Connections and protective devices must be appropriate for the current and installation environment.
An open breaker handle or unused panel space does not prove sufficient capacity. Load calculation and equipment compatibility should have been completed before installation. If a service is overloaded or a control is limiting output, increasing the thermostat cannot solve the problem.
240 V Versus 208 V
North American properties can supply different line-to-line voltages depending on the electrical system. The installed heater must be approved and sized for the actual supply. Never assume that a 9 kW label at one voltage provides 9 kW at another; use the model's published table and electrician's measurements.
Breaker and Conductor Problems
A breaker that stays on confirms only that it has not tripped. It does not show that every heater circuit is energized or that connections are healthy. Breaker replacement, conductor changes, and terminal work require professional evaluation; increasing breaker size without redesign is dangerous.
Controller and Contactor Output
External-control systems such as UKU use control logic and switching equipment to deliver power to the heater. The app can report heating while a contactor, output, sensor circuit, safety input, or wiring connection prevents full operation. The installer should use the controller diagnostics and manual rather than substituting generic tests.
Ask the electrician to document these commissioning results:
-
Nameplate match: The exact heater, controller, regional version, supply voltage, phase, and wiring diagram agree.
-
Voltage under load: The required supply reaches the heater while it is actively calling for full heat.
-
Current and element output: The measured load demonstrates that every intended element circuit is contributing.
-
Switching operation: Relays, contactors, safety inputs, timers, and control outputs operate according to the exact system diagram.
-
Connection condition: Approved terminals, conductors, grounding, disconnects, and enclosures show no heat or installation damage.
Heater Size and Effective Sauna Volume
A fully functional heater can still be too small for the completed room. Heater sizing begins with finished interior volume, then adds the manufacturer's allowance for glass, tile, brick, logs, and other uninsulated surfaces. Panoramic cabins often have a much larger effective volume than their floor dimensions suggest.
Undersizing usually produces long continuous operation, weak winter performance, slow recovery after door opening, and a temperature plateau below the owner's target. The problem is most visible during cold, windy weather because shell losses rise. A cabin that barely succeeds in summer may expose the mismatch in winter.
Oversizing is not a casual correction. Heaters have minimum as well as maximum approved room volumes. An oversized heater can heat air faster than stones and surfaces, cycle abruptly, create harsh gradients, and violate clearance or electrical requirements. Recalculate before changing equipment.
Toule or Harvia 6 kW Systems
Rodeo Wellness uses Toule or Harvia 6 kW heaters in applicable configurations. Toule's NTSA-60 and NTSC-60 documentation and Harvia's 6 kW product documentation each provide model-specific room ranges and electrical requirements. The installed model's manual—not a generic 6 kW rule—determines suitability.
A 6 kW heater should provide traditional sauna temperatures when the room sits within its adjusted range and the system delivers full output. If the cabin includes extensive glass or a higher ceiling, verify that the effective volume was calculated before concluding the heater itself is defective.
HUUM DROP 6 kW
The HUUM DROP 6 kW is intended for a published room-volume range that varies with supply configuration. Its large stone mass supports softer, sustained steam but needs correct airflow and heat soak. Weak performance can result from volume mismatch, partial electrical output, incorrect sensor placement, or tightly packed stones just as with other systems.
HUUM DROP 9 kW
The DROP 9 kW provides additional capacity for an approved larger load. If a correctly installed 9 kW system still performs like a smaller heater, verify actual voltage and element output rather than assuming more warm-up time is normal. At 208 V, published output differs from the 240 V rating, so voltage-specific sizing is essential.
Changes Made After Installation
Adding panoramic glass, tile, an interior partition, a higher ceiling, or a new ventilation fan can change the load. Recalculate the finished room after renovations. A heater that was correctly sized for the original cabin may no longer be appropriate.
Temperature Sensor Placement and Early Cycling
The sensor tells the controller when the room has reached temperature and often incorporates overheat protection. If it sits in an abnormally hot location, the heater can cycle off while the upper bench remains cool. If a cold draft cools it, the heater may run too long and create excessive temperatures elsewhere. Both conditions are installation problems.
Harvia emphasizes that the sensor must be installed in the model-specific location. Its current guidance warns against corners, doors, glass, windows, and supply-air paths that distort readings. The appropriate position can change with heater distance from a wall and whether the heater is embedded. HUUM and Toule systems have their own instructions and should not borrow diagrams from another brand.
Compare controller temperature with a reliable thermometer near upper-bench head height only after the room stabilizes. A consistent difference can be normal because the instruments occupy different heat layers. A large or erratic difference supports reviewing placement, airflow, calibration, or sensor condition with the installer.
Sensor Too Close to the Heater
A sensor placed closer than specified can warm quickly and shut the heater down before the cabin catches up. Moving it without authorization is not the solution. Reinstall it only according to the exact diagram and qualified-service requirements.
Sensor in a Hot Corner
Corners can retain warmer air. A sensor there may overstate the representative room condition, particularly if the upper bench is across the cabin. Harvia specifically notes that corner placement can make heating capacity appear lower than normal.
Supply Air Cooling the Sensor
Air from a supply valve can artificially cool the sensor and cause excessive heater operation. Harvia provides example separation distances for particular vent types, but the exact heater manual controls. Redirecting or closing vents without design review can create another problem.
Unauthorized Sensor Relocation
Lowering, covering, insulating, or offsetting the sensor to chase more heat can defeat control behavior and overheat protection. If the sauna is cool despite correct placement, investigate output, sizing, stones, leakage, and room design rather than manipulating the safety system.
Ventilation Problems and Uneven Heat
Ventilation is necessary for breathing comfort, heater circulation, temperature distribution, and drying. Incorrect placement or excessive mechanical exhaust can remove heat faster than the heater replaces it. Insufficient airflow can also produce poor circulation and blocked heater convection. The goal is the specified airflow path, not simply more or less air.
A room can be hot at the ceiling but cool around the feet if bench height and circulation are poor. Raising the thermostat may intensify head-level heat without improving lower-body comfort. Evaluate bench geometry, supply, exhaust, heater location, and door undercut as one system.
Do not close vents during troubleshooting unless the manufacturer procedure explicitly calls for a temporary diagnostic step under professional direction. Blocking ventilation can worsen air quality, moisture retention, sensor accuracy, and heater temperature.
Excessive Exhaust
A powerful fan or an exhaust placed too high can remove the hottest air rapidly. Later fan additions are especially suspect when performance changed after renovation. Confirm flow and placement with the sauna design rather than relying on household ventilation rules.
Supply-Air Short Circuit
Air entering near the exhaust can leave without circulating through the occupied zone. Air directed at the sensor can distort control. Smoke pencils and professional airflow assessment can help installers diagnose circulation without altering heater safety systems.
Blocked Heater Airflow
Stored objects, incorrect guards, tightly packed stones, or unapproved bench embedding can restrict air around the heater. Preserve all manufacturer clearances and required heat-guiding components.
Door Seals Air Leaks and Heat Loss
A door that appears closed can leak substantially under winter wind. Foundation movement, loose hinges, swollen wood, ice, misaligned catches, or changed seals can create gaps. A new cabin that is not square or level may never allow the door to sit correctly.
Windows, roof joints, conduit penetrations, panel connections, and floor interfaces can also leak. Insulation slows conduction, but it cannot compensate for uncontrolled air exchange. Inspect accessible joints visually and during windy conditions without blocking intended ventilation.
Glass itself adds heat loss even when perfectly sealed. If every enclosure detail is correct but the heater remains near the upper limit of its approved effective volume, the design may simply require more approved capacity.
Door-Opening Habits
Repeatedly opening the door during preheat replaces hot air with outdoor air. Prepare towels, water, and accessories before starting while keeping all items outside heater clearances. During group sessions, stage entry and exit rather than holding the door open.
Foundation and Seasonal Movement
Frost heave or an unlevel base can rack the cabin and change door fit. Correct the foundation or frame alignment rather than planing or forcing components without understanding the cause.
Moisture Intrusion
Wet insulation or wood absorbs heating energy and may indicate roof, flashing, drainage, or drying problems. A gradual loss of performance after storms warrants enclosure inspection before electrical replacement.
Inspect the enclosure in this order:
-
Door operation: Confirm square alignment, safe closure, hardware condition, and no obvious unintended gaps.
-
Glass perimeter: Check approved gaskets, frames, fasteners, and signs of movement or water entry.
-
Roof and panel joints: Look for incomplete seals, displaced trim, leaks, or wind paths created during assembly.
-
Penetrations: Review visible lighting, conduit, sensor, and accessory openings without disturbing concealed wiring.
-
Foundation level: Verify the cabin remains supported, square, drained, and stable through seasonal movement.
Sauna Stones and Heater Airflow
Stones are essential to electric-heater performance. They shape airflow, protect elements, store heat, and convert water into steam. Stones packed too tightly or compacted by repeated heat cycles can block convection, making the room heat slowly even when every element works.
Harvia identifies incorrect, compacted, or unsuitable stones as a cause of slow heating and recommends periodic rearrangement. HUUM requires approximately 55 kg of appropriately sized stones for the DROP and instructs users to place them individually while leaving airflow. The correct quantity and arrangement differ by model.
Do not remove stones to expose elements during normal homeowner troubleshooting. Some manufacturer diagnostic instructions involve viewing element operation after stones are moved, but that work should be coordinated with qualified service because elements are energized, extremely hot, and easy to damage or contact accidentally.
Tightly Packed Stones
Dense packing reduces upward airflow and can concentrate heat around elements. The cabin warms slowly while the heater becomes excessively hot. Allow the unit to cool fully, isolate power according to the manual, and have stones serviced by a competent person using the approved procedure.
Deteriorated Stones
Cracked stones create small fragments that settle to the bottom and obstruct airflow. Performance may decline gradually. Replace deteriorated pieces with approved sauna stones rather than decorative landscape rock.
Incorrect Quantity
Too many stones can choke airflow; too few can expose elements, create harsh heat, and reduce steam quality. Use the specified mass and size. The large DROP basket should not be treated like a compact conventional heater, and vice versa.
Water Applied Too Early or Too Heavily
Water cools stone surfaces. Repeated application before the stones recover can make steam weak and extend the impression that the room is underpowered. Use modest amounts only after the heater is ready and follow water-quality guidance.
Cold-Weather Operation
Outdoor saunas begin with a larger thermal deficit in winter. Every bench, stone, wall, and glass surface may start below freezing, and wind increases losses. Longer warm-up alone is not proof of a fault. Compare winter performance with an established seasonal baseline.
However, Harvia's current support guidance explains that certain mechanically controlled heaters can have cold-sensitive overheat-protector behavior in unheated outdoor saunas. It recommends checking model suitability where the cabin drops below freezing. This limitation is specific to controls and models, so the exact installed equipment matters.
Electronic systems can have different cold-start behavior, but they still depend on sensor placement, electrical supply, enclosure performance, and approved operating conditions. Wi-Fi availability does not make equipment suitable for temperatures outside its rating.
Cold-Soaked Structure
Allow additional time for the structure and stones after the air first warms. A sauna that eventually reaches stable temperature may be operating normally. Track the full curve rather than judging it at the same minute used in summer.
Wind and Snow
Wind-driven leakage, blocked exterior vents, ice around the door, and snow against walls can change performance. Clear the cabin according to maintenance guidance without sealing vents or creating unsafe heater modifications.
Mechanical-Control Limitations
If a mechanically controlled heater does not start in severe cold or repeatedly trips its limit, stop resetting it blindly. Have the dealer or electrician confirm the model's cold-condition guidance and whether the chosen configuration suits an unheated outdoor installation.
Diagnosing Rodeo Wellness Heater Configurations
The diagnostic logic is the same across Rodeo configurations, but the equipment details differ. First identify whether the sauna has a Toule or Harvia 6 kW heater with its specified controls, a HUUM DROP 6 kW, or a HUUM DROP 9 kW with Wi-Fi UKU. Photograph the labels rather than relying on order memory.
Next compare the finished effective volume with the exact voltage-specific range. Then verify sensor and ventilation placement, stone quantity, and control setup. If those conditions are correct, a licensed electrician should confirm that every element circuit receives the intended output under load.
Do not exchange parts between brands or follow a sensor diagram from a visually similar heater. Clearances, control architecture, stone loading, and wiring vary. Model-specific documentation protects both performance and warranty.
Toule or Harvia 6 kW Checklist
Confirm the exact 6 kW model, room-volume range, control type, timer operation, sensor or thermostat location, stone arrangement, supply voltage, and current draw. If some elements heat and others do not, the electrician should determine whether the cause is element failure, wiring, switching, or supply.
HUUM DROP 6 kW Checklist
Confirm regional voltage, approved room range, 55 kg stone load, correct stone placement, sensor and door-safety positions, UKU configuration, contactor or control output, and actual element contribution. Allow for full stone heat soak when evaluating steam.
HUUM DROP 9 kW Checklist
Confirm that the effective room volume actually belongs in the 9 kW model's range and that the electrical installation matches the voltage-specific documentation. Partial output from a 9 kW system can masquerade as a sizing problem, so measured commissioning data are especially useful.
Wi-Fi UKU App Behavior
An app showing heating confirms a command, not necessarily full electrical output. Record error codes, target, start time, sensor reading, door status, and when cycling occurs. Provide screenshots to the installer or support team, but do not use repeated remote starts to work around a fault.
A Step-by-Step Troubleshooting Sequence
A disciplined sequence prevents unnecessary heater replacement. Begin with symptoms and operating conditions, inspect accessible non-electrical factors, verify the design documents, and then request measured electrical commissioning. Change one factor at a time and record the outcome.
The sequence should stop whenever a safety symptom appears. It should also stop before electrical covers, energized components, sensor relocation, or control modification. Those steps require qualified service and exact manufacturer documentation.
After a correction, retest under comparable conditions. A repaired element connection may improve the rate of rise immediately, while corrected insulation or stones may require a full heat cycle to evaluate. Confirm both air temperature and steam readiness.
Step One: Record the Pattern
Note whether the issue has existed since installation, appeared suddenly, progressed gradually, or occurs only in cold weather. Record outdoor temperature, wind, starting cabin temperature, setpoint, controller reading, upper-bench reading, elapsed time, door use, and error codes.
Step Two: Confirm Settings and Readiness
Verify the timer, target, operating mode, remote-start state, and door sensor. Ensure the door remains closed and the cabin is not being used for storage. Allow a fair interval for stone and bench heat soak.
Step Three: Inspect the Cabin
Check door alignment, visible gaps, glass and roof joints, moisture, blocked vents, foundation movement, and recent modifications. Do not seal intended ventilation.
Step Four: Review Stones and Sensor
Compare stone quantity and arrangement, sensor location, heater clearances, and vents with the exact manual. Arrange approved cold maintenance rather than reaching into an energized heater.
Step Five: Recalculate Heater Size
Use finished interior dimensions and manufacturer allowances for glass, tile, masonry, logs, and other uninsulated surfaces. Confirm the actual supply voltage and corresponding model range.
Step Six: Commission Electrically
Have a licensed electrician verify voltage under load, current contribution, element circuits, control outputs, contactors, connections, breaker, conductors, grounding, and disconnects. Ask for written results rather than a visual impression that the heater is on.
Provide the service professional with a complete evidence package:
-
Equipment identity: Heater, controller, model, serial number, voltage, purchase date, and installation manual.
-
Room calculation: Finished dimensions, ceiling height, glass area, uninsulated surfaces, and selected heater range.
-
Performance log: Outdoor conditions, start temperature, setpoint, time-and-temperature readings, cycling, and steam behavior.
-
Installation record: Electrician, permit or inspection information, wiring diagram, commissioning readings, and later modifications.
-
Visual record: Safe exterior photographs of heater, stones, sensor, vents, door, glass, labels, and displayed errors.
Frequently Asked Questions
Why Is My Sauna Not Getting Hot Enough
The heater may be delivering partial output, undersized for the effective volume, cycling from incorrect sensor information, losing heat through glass or air leaks, restricted by stones or ventilation, or affected by cold weather. Diagnose the pattern systematically.
Can Heating Elements Be Connected Incorrectly
Yes. A multi-element heater can appear to operate while one or more elements are not properly energized because of wiring, supply, switching, or element faults. A licensed electrician should verify voltage and current under load using the exact diagram.
How Can I Tell If One Sauna Element Is Not Working
Slow heating after previously normal performance, uneven heater output, or measured low current can indicate a failed element. Visual glow is not conclusive. Qualified electrical testing is the reliable method.
Why Does the Controller Say Heating When the Sauna Is Cool
The controller may be calling for heat even when a contactor, supply leg, connection, or element prevents full output. It can also read a different temperature zone than the upper bench.
Can Incorrect Voltage Make a Sauna Heater Weak
Yes. Output and approved room range can differ between 208 V and 240 V configurations. The electrician must confirm the actual supply and exact heater rating.
Is a 6 kW Heater Large Enough
It can be sufficient when the completed effective room volume falls within the exact model's range. Glass, masonry, ceiling height, and outdoor exposure must be included in the calculation.
Will a 9 kW Heater Fix the Problem
Only if the approved sizing calculation calls for it. A larger heater will not correct bad wiring, wrong voltage, poor sensor placement, air leaks, or blocked stone airflow, and it may be unsuitable for a small room.
Can the Temperature Sensor Make the Sauna Feel Cool
Yes. A sensor in an abnormally hot location can cycle the heater off before the bathing zone is ready. It must remain in the model-specific approved position.
Should I Move the Sensor Lower
No, unless the manufacturer documentation and qualified installer specify that position. Unauthorized relocation can defeat control and overheat protection.
Can Ventilation Prevent the Sauna from Heating
Incorrect or excessive airflow can remove heat or distort sensor readings, but closing vents is not the safe solution. Correct the supply and exhaust layout according to the design.
Do Tightly Packed Stones Reduce Heat
Yes. Dense or deteriorated stones can restrict airflow and slow room heating. Service them only after full cooling and isolation, following the heater's instructions.
Why Is the Air Hot but the Steam Weak
The stones may not be fully heat-soaked, may be packed incorrectly, or may have deteriorated. Excess water can also cool them faster than they recover.
Can a Door Gap Make a Big Difference
Yes, especially outdoors in wind or freezing weather. A misaligned door can release hot air continuously even when the gap appears small.
Why Is My Sauna Only Weak in Winter
The cabin starts colder and loses heat faster. Wind, glass, leakage, frozen materials, or model-specific cold-control limitations can reveal marginal sizing or installation problems.
Can I Test Sauna Voltage Myself
Energized voltage and current testing is hazardous and should be performed by a licensed electrician familiar with the heater and controller. Homeowners can safely document symptoms and visible conditions.
Should All Heating Elements Glow
Element appearance varies with cycling, stones, lighting, and design. Manufacturer guidance may use element observation diagnostically, but electrical measurement by qualified service is more reliable and safer.
Why Does the Heater Shut Off Too Early
The sensor may be too hot, the controller may be configured incorrectly, the timer may have ended, an overheat limit may be activating, or airflow may be affecting the sensor. Review codes and exact installation.
Can Wi-Fi UKU Cause Low Heat
UKU settings, safety inputs, sensor information, contactor operation, or installation can affect heating commands. The app alone does not prove full power reaches every element.
When Should I Replace the Heater
Replace it only after confirming room sizing, voltage, element output, controls, sensor, stones, ventilation, and enclosure. Many low-heat complaints are correctable installation or maintenance issues.
When Should I Stop Using the Sauna
Stop for sparks, burning odor, electrical buzzing, repeated breaker or high-limit trips, visible damage, water exposure, melted components, or unstable controls, and obtain professional service.
Editorial Review and Primary Sources
This article was reviewed against current manufacturer information on October 8, 2026. Electrical design, sensor placement, room sizing, cold-condition limits, stone maintenance, and troubleshooting vary by model and market. Use the exact supplied documentation and qualified electrical service.
Harvia slow-heating troubleshooting guidance
Harvia temperature sensor installation guidance
Harvia cold-condition heater guidance
HUUM DROP North American installation manual
Toule NTSA and NTSC heater manual
Internal Linking Note
Link this guide to outdoor sauna heat-up time, temperature expectations, heater sizing, HUUM versus Harvia, Wi-Fi heaters, electrical requirements, ventilation, panoramic glass, insulation, stones, and winter maintenance. Keep this page focused on diagnosing inadequate heat rather than repeating the general temperature or timing guides.
Final Thoughts
When a sauna is not getting hot enough, do not assume the heater simply needs more time. A partially energized element bank, incorrectly connected heating elements, failed element, wrong voltage, or control-output problem can let the system look active while delivering only a fraction of rated power. New installations that have never performed correctly should be electrically commissioned early.
If full output is confirmed, move through effective room volume, sensor placement, ventilation, door seals, glass, insulation, stones, and cold-weather conditions. The pattern of the fault—day one, sudden, gradual, or seasonal—usually points toward the most productive branch of the diagnosis.
Preserve every safety function and use model-specific instructions. Do not relocate sensors, block vents, increase breakers, remove required stones, or alter wiring to force more heat. A properly matched and installed system should provide stable traditional sauna temperatures without unsafe modifications.
Our Recommendation
For a Rodeo Wellness sauna that has never reached expected temperature, first have the original installer or a licensed electrician confirm the exact heater model, supply voltage, wiring diagram, element connections, current contribution, controller or contactor output, and safety inputs. Request written commissioning readings so partial output is either identified or conclusively ruled out.
Next confirm that the Toule or Harvia 6 kW, HUUM DROP 6 kW, or HUUM DROP 9 kW heater falls within the completed effective-volume range at the actual voltage. Include all panoramic glass and uninsulated surfaces. Review the sensor, ventilation, door, stone loading, and cold-condition suitability against the exact manual.
For HUUM systems with Wi-Fi UKU, use app history and error information as evidence, not as proof that every element receives full power. The best repair is the documented correction of the actual cause - electrical, sizing, airflow, enclosure, stones, or climate - not a higher setpoint or a larger heater chosen without calculation.



 OUR BEST SELLERS