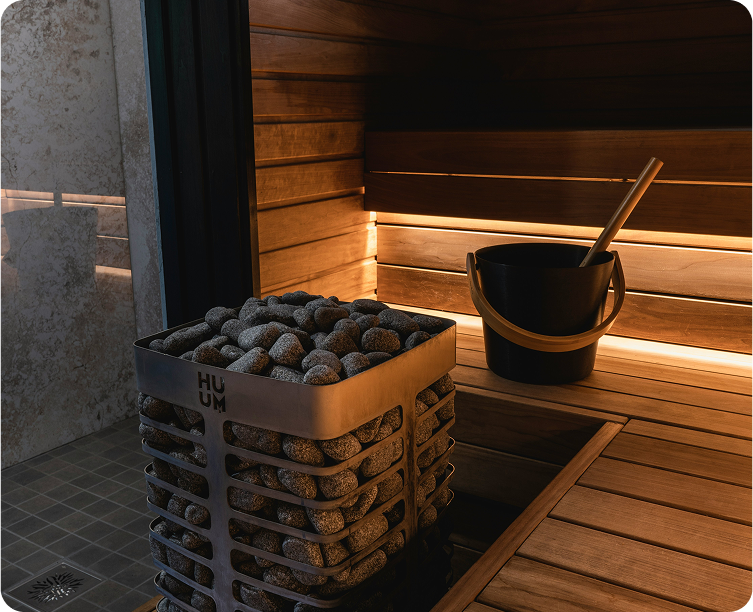
To protect an outdoor sauna from weather, manage water in layers. The roof must shed rain and tolerate the site's snow conditions; flashing and drip edges must direct runoff away from vulnerable joints; the foundation must hold the cabin level above standing water; exterior wood needs the manufacturer-approved finish; and ventilation must allow the structure to dry after storms and sauna sessions. No single sealant, cover, or coating can replace that complete system.
Rain and snow damage outdoor saunas in different ways. Rain can enter through roof seams, wind-driven joints, windows, doors, and unsealed end grain. Snow adds dead load, blocks vents, stores water against walls, creates ice around doors, and produces concentrated runoff during thaw. Repeated freeze-thaw cycles then widen defects, move foundations, loosen fasteners, and stress finishes.
This guide explains roofing, gutters, drainage, foundations, exterior sealants and finishes, airflow, weather covers, snow removal, and seasonal inspection. Product-specific installation instructions and local structural requirements always take priority. A barrel sauna, insulated cabin, cube sauna, panoramic-glass model, and flat-roof modular unit can require very different weather details even when they use the same wood species.
Quick Weather-Protection Plan
Start at the top and work down. Confirm that the roof covering is complete, undamaged, correctly lapped or bonded, and compatible with the sauna design. Make sure drip edges, gutters, downspouts, and ground grading carry water beyond the foundation. Keep the base above ponding and splashback, then protect exterior wood with the approved breathable treatment while leaving interior surfaces and ventilation exactly as the manufacturer specifies.
During winter, keep doors, vents, electrical equipment, and access paths clear. Remove roof snow only when the product manual, measured accumulation, local load conditions, or a qualified professional indicates it is necessary, using a non-damaging method from the ground where possible. Never climb onto a snowy sauna roof unless a competent safety plan specifically permits it.
|
Protection Layer
|
Primary Job
|
Common Failure
|
| Roof covering |
Stops bulk rain and snowmelt |
Open seams, punctures, failed adhesive, missing shingles, damaged metal |
| Flashing and drainage |
Moves runoff beyond walls and base |
Short drip edges, blocked gutters, downspouts emptying beside foundation |
| Foundation |
Keeps sauna level, supported, and above wet ground |
Ponding, settlement, frost movement, buried bottom boards |
| Exterior finish |
Slows wetting and UV weathering |
Wrong product, missed end grain, peeling film, overdue maintenance |
| Airflow and drying |
Removes bathing and weather moisture |
Blocked vents, trapped cover, wet accessories, closed damp cabin |
| Seasonal inspection |
Finds small defects before structural damage |
Checking only after an active leak or door failure |
Weather Protection Action Checklist
A weather-protection plan is strongest when every task has a timing trigger and a responsible person. Homeowners can keep drains and vents clear, remove loose debris, document stains, monitor snow, and renew approved finishes. Roof repair, structural assessment, chimney work, concealed-moisture investigation, and water exposure involving electrical equipment should be assigned to qualified professionals.
Complete the installation checks before the first severe season, then repeat the maintenance checks in spring and fall. Add event-based inspections after major wind, hail, rain-on-snow, unusual drifting, falling branches, flooding, or foundation movement. A short inspection performed at the right time is more valuable than a long annual checklist completed after damage has already developed.
Use this sequence whenever the forecast or season changes:
-
Before heavy rain: Clear roof outlets and gutters, verify downspout discharge, close the door, and remove objects that obstruct drainage or airflow.
-
Before snow season: Confirm roof guidance, prepare a safe non-damaging removal tool, mark snow-storage areas, and protect access to vents and electrical disconnects.
-
After a major storm: Inspect from the ground for displaced roofing, loose metal, blocked drains, glass damage, staining, fallen debris, and water around the base.
-
During thaw: Move stored snow away from walls, observe meltwater, prevent entrance ice, and check whether the foundation remains level and drained.
-
Before refinishing: Correct leaks and runoff first, confirm dry wood and compatible products, and document the coating and application date.
Build a Layered System to Protect Outdoor Sauna from Weather
Durable outdoor construction assumes that some water will reach outer surfaces. The design then sheds, drains, separates, and dries that moisture before it reaches sensitive wood or concealed assemblies. This principle is more reliable than attempting to make every exterior joint permanently waterproof with surface caulk.
The roof is the first drainage plane, exterior cladding and trim form the next line of defense, and the foundation separates the structure from ground moisture. Flashing bridges transitions around windows, doors, roof edges, and penetrations. Ventilation and drying provide resilience when small amounts of moisture enter despite those layers.
Do not alter one layer without considering the others. A full plastic cover may stop direct rain but trap condensation. A bead of sealant can close a visible gap while directing water into an adjacent joint. A new gutter can prevent splashback yet cause foundation saturation if its outlet ends beside the sauna.
Bulk Water Before Vapor
Solve roof leaks, runoff, ground water, and snowmelt before debating minor interior condensation. Bulk water can deliver liters into the structure; vapor control and ventilation manage much smaller moisture loads. Visible staining after rain usually needs an exterior-path investigation.
Drainage Before Coating
A premium finish performs poorly on wood that remains wet from roof discharge or soil contact. Correct slopes, gutters, splash, and base elevation first. Apply finish only to clean, dry, properly prepared wood under suitable weather conditions.
Drying Reserve
Even an excellent exterior needs time and airflow to dry. Keep vents clear and preserve manufacturer-designed cavities and gaps. Decorative skirting, landscaping, stacked firewood, and close-fitting covers can reduce the drying reserve.
Every weather-protection plan should answer:
-
Where does roof water go? Identify every slope, valley, edge, gutter, downspout, splash point, and discharge location.
-
Where does ground water go? Confirm finished grade, foundation drainage, snow-storage areas, and the direction of spring melt.
-
What can dry? Preserve vents, service gaps, cladding airflow, underside clearance, and access for inspection.
-
What is protected by finish? List wood species, factory treatment, approved coating, end grain, cut edges, and renewal schedule.
-
What carries snow? Confirm the roof system, structural rating, local snow conditions, drift exposure, and removal procedure.
Roofing Is the Primary Defense
The roof receives the most direct weather exposure and protects every system below it. Outdoor-sauna products may use asphalt shingles, roofing felt, EPDM or another membrane, standing-seam or formed metal, cedar shingles, or an integrated proprietary assembly. Each has different slope, edge, fastener, adhesive, flashing, and maintenance requirements.
Harvia markets a roofing-felt package specifically to provide weatherproofing for its Solide outdoor sauna, while current SaunaLife documentation illustrates coordinated roof metal, drip metal, gutters, outlets, and downpipes on certain cabin designs. These examples show that weather resistance comes from a complete roof assembly rather than exposed wall boards alone.
Install the supplied roof promptly after assembly. Temporary packaging, tarps, and bare roof boards are not substitutes. If weather interrupts construction, follow the manufacturer-approved temporary protection method and verify that trapped moisture has dried before closing the assembly.
Roof Pitch and Drainage
Sloped roofs shed water and snow differently from low-slope roofs. Do not apply a shingle or membrane outside its permitted slope. A low-slope roof depends heavily on continuous membrane detailing and controlled drainage; a peaked roof still needs correct underlayment, laps, ridges, and eaves.
Roof Edges and Overhangs
Overhangs reduce direct wetting of walls, doors, and windows, but they also create snow-shedding zones. Drip edges must project water clear of fascia and cladding. Short or back-sloped edges can pull water underneath through surface tension.
Roof Penetrations
Chimneys, vents, cables, and accessory mounts are high-risk locations. Use listed flashing and compatible components for the roof and penetration. Do not rely on a surface bead of generic sealant around a hot chimney or moving metal joint.
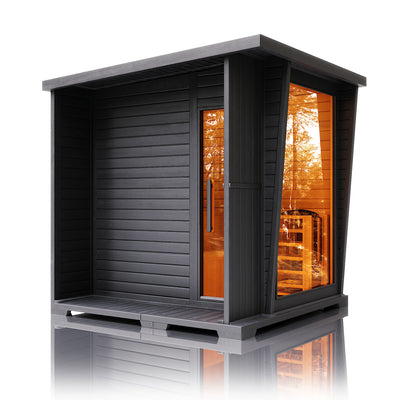
Flat and Low-Slope Roofs
Keep drains and scuppers clear, inspect seams and parapet transitions, and avoid placing objects that can puncture or block the membrane. Ponding after the expected drainage period suggests slope, obstruction, deformation, or outlet problems that need professional review.
Flashing Gutters and Controlled Runoff
Flashing redirects water at changes in material or geometry. Windows, doors, roof-to-wall transitions, drip edges, base trim, and penetrations need details that overlap in the direction of drainage. Sealant supports these details but should not be the only barrier at a joint exposed to ongoing runoff.
Gutters are useful when roof water would fall onto a doorway, panoramic window, foundation, deck, or narrow passage beside the house. They must be sized, sloped, supported, and maintained for the site. In snow country, snow sliding from the roof can overload or tear away poorly located gutters.
Downspouts should discharge to an approved location where water continues away from the sauna. An extension that empties onto the gravel base can saturate the support layer, promote frost movement, and undermine leveling. Coordinate roof drainage with the entire site plan.
Window and Door Head Flashing
Top flashing should send water over, not behind, trim and frame components. Side and sill details need a drainage path. Caulking the bottom of a designed drainage opening can trap water inside the frame.
Drip Lines and Splashback
Observe the sauna during real rain. Water striking soil, pavers, or a deck can splash onto lower boards. Extend the base, add suitable drainage material, or redirect runoff so the bottom of the sauna dries quickly.
Gutter Maintenance
Clear leaves, needles, ice, and nests before overflow develops. Inspect hangers, seams, end caps, and downspout joints. Use a safe ground-based method or qualified service rather than climbing on a wet or icy roof.
Inspect runoff as a complete route:
-
Roof surface: Water moves toward intended edges or outlets without prolonged ponding or reverse flow.
-
Edge transition: Drip metal, fascia, membrane, and shingles overlap correctly and show no staining underneath.
-
Collection: Gutters remain clear, supported, and positioned for rain and expected snow behavior.
-
Discharge: Downspouts and drains carry water beyond the foundation, walkway, electrical route, and neighboring property.
-
Ground exit: Grade and soil accept or convey the flow without erosion, ice, splashback, or recirculation beneath the sauna.
Foundation Design and Ground Drainage
A weather-resistant sauna starts on a stable, level, load-bearing foundation that drains. Concrete pads, piers, pavers, compacted crushed stone, and engineered decks can all work when designed for the product, soil, frost, and local requirements. The critical outcome is continuous support where required, separation from soil, and no standing water at the base.
Several outdoor-sauna manuals instruct installers to place the cabin above direct ground contact and use a water-resistant separation between the base frame and supporting surface. That capillary break limits moisture wicking into wood. It must remain compatible with the structural support pattern and not create a trapped-water shelf.
The foundation should extend and drain in a way that reduces mud and splash without forming a basin. A large flat concrete pad can still be problematic if it slopes toward the sauna. Verify elevations before installation, then recheck after the first wet season and freeze-thaw cycle.
Concrete Pads
Concrete provides durable level support when correctly reinforced and drained. Design its slope, perimeter, and any curb or sill so water moves away. Sealant between wood and concrete is not a substitute for an approved sill separation and drainage detail.
Gravel and Paver Bases
These systems depend on excavation, compaction, angular aggregate, edge restraint, and frost-appropriate depth. Decorative loose stone placed on topsoil will settle and hold water. Keep vegetation and soil from migrating against the lower walls.
Deck Foundations
A deck must support the sauna's dead load, occupants, heater, stones, and environmental loads. Water should drain through without saturating the house ledger or trapping moisture beneath sauna runners. A structural professional should review uncertain decks.
Frost and Settlement
Uneven movement can open roof joints, rack doors and windows, stress glass, and redirect drainage. If gaps and door problems appear together after winter, evaluate the foundation before trimming the door or adding sealant.
Exterior Wood Finishes and Sealants
Exterior finish slows moisture uptake, UV discoloration, surface erosion, and dirt accumulation. It does not waterproof a defective building. Use only the product type approved for the sauna's wood species, factory treatment, and assembly. Cedar, spruce, pine, and thermally modified wood can have different preparation and maintenance requirements.
Penetrating stains and oils generally allow easier renewal than thick film-forming coatings, but the manufacturer recommendation controls. A clear finish preserves more natural appearance while offering less pigment-based UV protection than a suitable tinted product. Untreated cedar may weather to silver while remaining serviceable, provided the product permits that approach and water is well managed.
Interior benches and walls should not receive ordinary exterior deck stain, paint, or sealant. Heat can release odors or chemicals, and film coatings can become uncomfortable. Use interior sauna products only where the cabin maker allows them.
Surface Preparation
Clean gently, remove failed finish as directed, allow the wood to dry, and work within the coating's temperature and humidity limits. Pressure washing can drive water into joints and damage soft wood fibers; Thermory specifically warns against pressure washers and running water for sauna interiors.
End Grain and Cut Edges
End grain absorbs water readily. Field cuts, exposed trim ends, lower cladding edges, and drilled holes may require special treatment. Complete approved protection promptly during assembly rather than waiting for the next annual maintenance cycle.
Sealant Selection
Use sealants only where the manufacturer specifies them and confirm compatibility with wood, membrane, metal, glass, finish, temperature, and movement. Generic silicone can fail to bond, stain wood, trap water, or interfere with later refinishing.
Do Not Seal Designed Drainage
Window weeps, ventilation openings, cladding gaps, and roof outlets must remain functional. If a gap's purpose is unclear, consult the assembly drawings before filling it. A visually continuous bead is not automatically a correct detail.
A finish plan should record:
-
Wood and factory condition: Species, thermal modification, factory coating, moisture condition, and approved preparation.
-
Product compatibility: Exterior-only or interior-approved use, vapor behavior, heat limits, UV protection, and recoating method.
-
Coverage details: End grain, field cuts, trim, hidden faces required during assembly, fastener penetrations, and lower edges.
-
Weather window: Required dry time, temperature, rain-free interval, shade, and wood moisture before application.
-
Renewal trigger: Fading, water absorption, checking, worn high-exposure faces, or the manufacturer's calendar interval.
Airflow and Drying Without Weather Entry
A protected outdoor sauna still needs to breathe. Ventilation supports heater operation and air quality during bathing, then helps remove moisture afterward. Exterior vent covers should resist direct rain and pests without restricting the designed airflow. Snow, leaves, insects, and landscaping can obstruct them seasonally.
Drying instructions vary. Some manufacturers recommend residual heater operation followed by opening vents or the door; others specify particular positions based on climate and ventilation design. Follow the supplied cabin and heater guidance. Cold humid air may not dry wood simply because the door is open.
Do not cover vents with plastic during storms or winter storage unless the manufacturer explicitly requires it. A blocked vent can trap bathing moisture and create condensation inside walls or on hardware. Use properly designed exterior hoods, screens, and orientations instead of temporary tape.
Post-Session Drying
Remove wet towels and buckets, wipe standing water, lift removable floor grids if instructed, and use the approved heat-and-ventilation cycle. Check that water has not pooled at glass sills, door tracks, or the heater base.
Storm Drying
After wind-driven rain, inspect vulnerable orientations and allow wet exterior surfaces to dry. If moisture appears inside without sauna use, document the weather direction and trace the envelope rather than assuming bathing condensation.
Vent Covers
Keep exterior covers secure, free of snow and debris, and correctly oriented. Screens that are too fine can clog and reduce airflow; missing screens can admit insects. Use the product's approved assembly.
Weather Covers Tarps and Protective Shelters
A purpose-designed cover can protect some barrel saunas or unused products, but a generic impermeable tarp can trap moisture, abrade finishes, block vents, and collect water or snow. Use only a cover approved for the exact model and installation. Confirm how it is secured against wind and whether vents remain open.
Covers are not substitutes for permanent roofing. They are most useful for models designed around them, transport or construction stages covered by instructions, or long periods of non-use where the manufacturer recommends protection. Remove and inspect them periodically so concealed leaks and condensation are not ignored.
A freestanding canopy or pavilion may reduce exposure, but it can affect permits, fire clearances, chimney operation, snow drifting, ventilation, service access, and structural loads. Review the complete design before building a roof over an existing sauna.
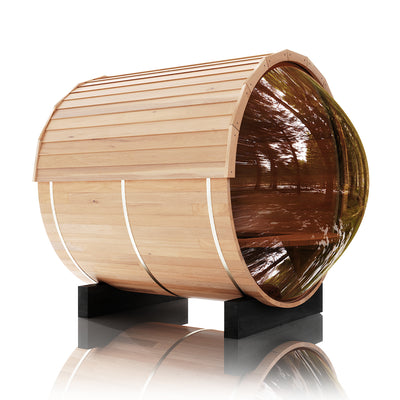
Barrel-Sauna Roof Covers
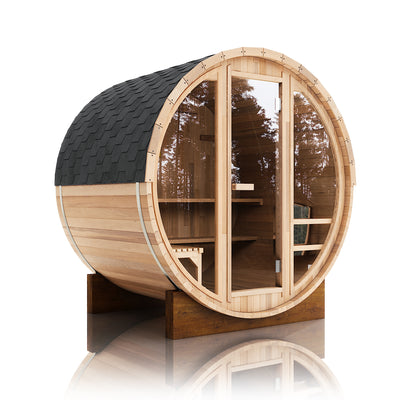
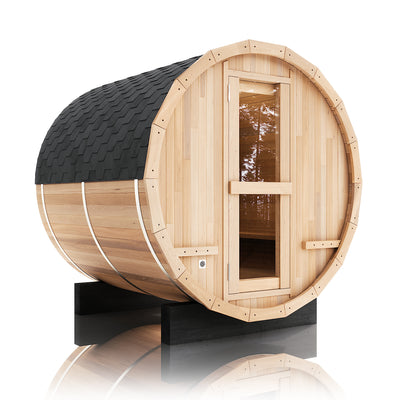
Barrel shells need protection appropriate to their joinery and climate. Some use fitted shingles or membrane systems over the curved top; others use approved rain jackets. The cover should shed water past side spring lines without sealing the entire wood shell against drying.
Temporary Construction Tarps
Secure temporary protection so wind cannot rub it through the roof or pull on the structure. Pitch it to drain, prevent ponding, and remove it as soon as the permanent roof can be completed under suitable conditions.
Long-Term Storage
Clean and dry the sauna fully, remove wet accessories, maintain ventilation, protect power and controls according to manuals, and inspect the cover after storms. A covered but damp cabin can deteriorate faster than an uncovered properly roofed one.
Snow Ice and Freeze-Thaw Management
Snow protection begins with structural design. Local ground snow does not equal roof snow; drifting, roof geometry, wind, adjacent buildings, and melt-refreeze can concentrate loads. Confirm the product's rating and local building requirements rather than applying a universal snow-depth rule.
Several current outdoor-sauna manuals instruct owners to remove snow to avoid damage while warning not to harm the roof covering. LeisureCraft similarly recommends using a gentle, non-scratching tool. The exact trigger and technique must match the roof system, snow type, height, and structural guidance.
Wet snow is far heavier than fresh powder, and ice layers can bond to membranes or metal. Aggressive chopping and metal shovels can puncture roofs, damage seams, and create leaks. If removal cannot be done safely from the ground without damaging the roof, hire qualified help.
Snow Removal Technique
Use a roof rake or soft non-scratching tool recommended for the roof, remove balanced amounts, and avoid scraping down to the membrane or shingles. Keep people away from the fall zone and protect windows, vents, chimneys, gutters, and electrical equipment below.
Snow Around the Base
Do not pile cleared snow against walls, doors, vents, or the foundation. Reserve a storage area where spring melt flows away. Shoveling a narrow trench around the sauna can create a basin that channels meltwater underneath.
Ice at Doors and Steps
Control roof drip and path drainage so meltwater does not refreeze at the entrance. Use surface treatments compatible with wood, metal, concrete, vegetation, and local runoff rules. Avoid striking glass or frames to free a frozen door.
Chimneys and Roof Equipment
Keep required clearances and access around chimneys, vents, solar fixtures, and electrical equipment. Snow sliding from an adjacent house can damage a sauna chimney or panoramic glass, so placement and snow guards may require professional design.
A winter plan should define:
-
Inspection trigger: Major storms, drifting, rain-on-snow, prolonged thaw-refreeze, roof deformation, or manufacturer-defined accumulation.
-
Safe method: Ground-based removal where possible, non-damaging tools, fall-zone control, and qualified help when access is unsafe.
-
Protected components: Roof membrane, shingles, metal seams, gutters, windows, vents, chimney, lighting, and electrical disconnects.
-
Snow storage: A location away from walls, foundation, pathways, drainage outlets, utilities, and neighboring property.
-
Thaw route: Grade, drains, downspouts, and base materials that carry meltwater away without refreezing at the entrance.
Wind-Driven Rain Coastal Exposure and Harsh Sites
Wind changes rain from a downward load into a pressure-driven one. Water can move beneath laps, around door edges, through incomplete joints, and upward at roof transitions. Exposed hilltops, waterfront sites, roof terraces, and open fields deserve more conservative detailing and inspection.
Coastal air adds salt that can accelerate corrosion on fasteners, hinges, roof metals, electrical enclosures, and heater components. Use the materials and maintenance specified for the site, rinse exterior salt deposits only through an approved gentle method, and replace incompatible hardware rather than coating over active corrosion.
Nearby trees reduce some wind but add shade, debris, branches, and snow drop. Keep vegetation away from roofs, vents, walls, drainage, and service zones. Inspect after storms for impacts and blocked outlets.
Prevailing-Weather Orientation
Place vulnerable doors and service openings away from the most severe exposure where site and code allow. Panoramic glass and large doors need approved sill and head details regardless of orientation; shelter is a supplement, not the primary barrier.
Storm Inspection
After severe weather, look from the ground for lifted roofing, loose trim, displaced gutters, damaged branches, debris, glass impact, and new staining. Photograph conditions before temporary repairs and prevent operation if electrical or structural components may be affected.
Coastal Hardware
Follow the manufacturer on stainless grade, coated fasteners, dissimilar-metal separation, cleaning, and replacement. Rust staining can signal a cosmetic fastener issue or a deeper connection problem; do not assume every stain is harmless.
Doors Windows and Panoramic Glass
Openings interrupt the weather barrier and deserve close inspection. Head flashing, frames, gaskets, sills, weep paths, hinges, and latches must work together. Sealant cannot compensate for a frame installed out of square or a sill that directs water inward.
Wood movement and foundation settlement can change door and window alignment. If a door begins sticking while roof gaps or glass clearances also change, inspect the base before trimming the door. Current outdoor-sauna manuals commonly emphasize level foundations for reliable doors and windows.
Panoramic glass does not absorb water, but its perimeter details, supporting structure, and interior condensation management matter. Do not drill, grind, or modify tempered glass. Chips, cracks, loose supports, or unexplained movement require professional assessment.
Door Thresholds
Keep thresholds clean and drained. Snow, leaves, grit, and ice can hold water against wood and prevent closure. Do not seal drainage slots or create an interior dam with aftermarket weather stripping.
Gaskets and Sealants
Inspect for gaps, compression loss, detachment, or incompatibility with cleaners and finishes. Replace with approved materials and correct the alignment that caused premature failure.
Condensation Paths
Expect some winter condensation on cold glass. Ensure it reaches a safe sill or wipe it before it saturates surrounding wood. Persistent water away from bathing suggests weather entry or another moisture source.
Electrical Equipment and Exterior Penetrations
Outdoor electrical equipment must remain within its environmental rating and installation requirements. Conduit entries, disconnects, junctions, lighting fixtures, controller modules, sensor cables, and penetrations through the sauna envelope need compatible weather detailing without trapping condensation.
Do not apply sealant blindly around an electrical enclosure. Some boxes use drains, breathers, gaskets, hubs, or mounting orientation to manage moisture. A licensed electrician should inspect water entry, corrosion, loose fittings, and damaged seals before the circuit is re-energized.
Wi-Fi controllers add communication equipment but do not change the need for physical weather protection. Locate modules and controls only in approved environments, preserve door-safety devices, and maintain service access after adding skirting, covers, or landscaping.
Conduit Entries
Entries should shed water and use approved fittings. A conduit that slopes toward the sauna or carries condensation can introduce moisture even when exterior rain does not reach the box. The electrician should correct the route and fittings.
Exterior Lighting
Fixtures must be approved for their location and temperature exposure. Check lenses, gaskets, fasteners, and water marks. Switch off affected circuits if moisture appears inside a fixture or light behavior changes after a storm.
Service Clearance
Do not bury disconnects, junction boxes, vents, or foundation edges behind snow, planters, firewood, or fitted covers. Weather protection should improve access, not conceal equipment that needs inspection.
Seasonal Inspection Schedule
Seasonal inspection turns weather protection from emergency repair into routine ownership. Inspect at least in spring and fall, after major storms, after unusual snow or ice, and whenever doors, warm-up, odor, lighting, or moisture behavior changes. High-exposure sites may need more frequent checks.
Use photographs from the same angles to track small changes. Mark stains lightly and record dates so you know whether they spread. Keep coating product, batch, application date, roof warranty, and repair documents together with the sauna manual.
Do not postpone a small roof defect until the next annual service. A loose edge, puncture, failed flashing joint, or blocked outlet can deliver repeated water into concealed wood. Temporary protection should be safe, breathable where required, and followed promptly by compatible permanent repair.
Spring
Inspect after freeze-thaw for foundation movement, door alignment, roof damage, gutter displacement, sealant separation, lower-wall wetting, and meltwater paths. Clean gently and allow full drying before refinishing.
Summer
Use dry weather for exterior treatment, roof repair, and detailed inspection. Manage UV exposure, vegetation, insects, and sprinklers. Ensure irrigation never sprays the sauna repeatedly.
Fall
Clear leaves and needles, check gutters and roof outlets, renew vulnerable finish where conditions permit, confirm door hardware, preserve vent clearance, and establish the snow-storage and removal plan.
Winter
Observe accumulation, drifting, ice, blocked vents, chimney access, entrance safety, and snow piled at walls. Expect longer warm-up but investigate sudden changes that accompany water entry or structural movement.
A complete seasonal inspection records:
-
Roof condition: Surface, seams, ridges, edges, fasteners, membrane, penetrations, gutters, and evidence of ponding.
-
Wall condition: Finish, end grain, joints, trim, splashback, staining, checking, vegetation, and ground clearance.
-
Openings: Door and window alignment, flashing, gaskets, sills, weeps, glass condition, hinges, and latches.
-
Base and site: Level, support, frost movement, erosion, settlement, grade, standing water, drains, and snow-storage impact.
-
Interior and systems: Drying, odors, moisture marks, vents, lighting, electrical equipment, heater clearances, and service access.
Common Weather-Protection Mistakes
The most common mistake is treating weather protection as a coating project. Owners apply more stain or caulk while runoff continues behind trim or beneath the base. A durable repair identifies the source, restores drainage, allows drying, and then renews compatible surface protection.
Another mistake is making the sauna too airtight. Wrapping the entire cabin, blocking vents, sealing drainage openings, or enclosing the base can trap the moisture produced during every session. The sauna must resist exterior water while still following its designed ventilation and drying strategy.
Finally, owners often wait for an interior drip before inspecting the roof. By then, insulation, sheathing, framing, or wiring may already be wet. Seasonal checks and post-storm observations catch defects earlier.
Generic Sealant Everywhere
Different joints move, drain, and heat differently. Use the specified product only at specified locations. Remove failed material and prepare surfaces properly rather than placing new sealant over dirt and moisture.
Downspout Beside the Foundation
A downspout that ends at the sauna can be worse than no gutter because it concentrates the entire roof load. Extend discharge to a stable approved outlet and protect against erosion and ice.
Permanent Tarp Wrapping
A tight tarp can trap condensation, chafe finish, block vents, and collapse under snow. Use a fitted approved cover or permanent roof system instead.
Aggressive Snow Removal
Metal shovels, ice choppers, and walking on unsupported roofs can create the leak being prevented. Use a safe, roof-compatible method and qualified help when necessary.
Frequently Asked Questions
What Is the Best Way to Protect Outdoor Sauna from Weather
Use a complete system: approved roofing, flashing, controlled runoff, a level drained foundation, compatible exterior finish, open ventilation, safe snow management, and seasonal inspection.
Does an Outdoor Sauna Need a Roof
Yes. It needs the permanent roof or weather-protection assembly specified for that model. Exposed wood boards or temporary packaging are not reliable long-term roofing.
Should I Put a Tarp Over My Sauna
Only if the manufacturer approves that cover and method. Generic tarps can trap condensation, block vents, abrade finishes, and collect snow or water.
Can an Outdoor Sauna Stay Outside All Winter
A purpose-built outdoor sauna can remain outdoors year-round when installed and maintained for the climate. Keep roofs, vents, doors, paths, drainage, and electrical access clear and follow snow guidance.
How Much Snow Can a Sauna Roof Hold
There is no universal depth. Snow density, drifting, roof shape, span, product rating, and local structural requirements determine capacity. Obtain model-specific and local guidance.
Should Snow Be Removed from a Sauna Roof
Many manufacturers recommend removal to prevent excessive load, but the trigger and method vary. Use non-damaging ground-based tools where possible and never compromise personal safety or roofing.
Can I Use a Metal Shovel on the Roof
Generally avoid sharp or abrasive tools that can puncture membranes, damage shingles, or scratch metal. Follow the roof manufacturer's approved method.
Should I Seal Every Gap in a Barrel Sauna
No. Some gaps support movement, ventilation, or drainage. Adjust bands and components only according to the model instructions and investigate persistent weather leaks before applying sealant.
What Is the Best Finish for an Outdoor Sauna
The best finish is the one approved for the exact wood, factory treatment, climate, and manufacturer warranty. Exterior penetrating stains or oils are common, but interior surfaces require different products.
Should Cedar Be Sealed
Some cedar saunas may weather naturally, while others require or benefit from approved exterior treatment. Follow the cabin manufacturer's instructions and keep bulk water away regardless of finish choice.
Can I Paint an Outdoor Sauna
Only if the manufacturer permits a compatible exterior coating and provides preparation guidance. Do not use ordinary exterior paint on hot interior surfaces.
How Do I Stop Water Pooling Under the Sauna
Correct grade, drainage, downspout discharge, foundation design, and settlement. Do not rely on sealant at the bottom boards while water remains trapped beneath them.
Why Is Water Coming Through the Door
Possible causes include wind-driven rain, missing head flashing, failed gaskets, blocked sill drainage, frame misalignment, roof runoff, or foundation movement. Trace the path during rain.
Is Condensation on Panoramic Glass Normal
Some condensation can be normal in cold weather. It should drain or be wiped safely, and the cabin should dry afterward. Persistent moisture without sauna use suggests leakage.
Should Vents Be Covered During Winter
No, unless the exact manufacturer instructions require a seasonal component. Keep vents clear of snow while preserving the designed airflow and exterior weather hood.
How Often Should I Inspect the Roof
Inspect at least seasonally, after major storms, after unusual snow or ice, and whenever interior staining or runoff behavior changes. High-exposure sites may need more frequent checks.
Can Snow Be Piled Against Sauna Walls
Avoid it. Stored snow keeps wood wet, blocks vents and access, and releases concentrated meltwater at the foundation.
Does the Foundation Need to Be Above Ground
The sauna base should be separated from soil and standing water according to its installation design. Many manuals specify elevated support or a water-resistant separation over a stable foundation.
Can I Pressure Wash the Sauna Exterior
Only if the manufacturer expressly permits it at an approved pressure and distance. High pressure can erode wood, drive water into joints, and damage finishes; gentle cleaning is safer.
When Should I Call a Professional
Call for structural movement, recurring leaks, roof damage, unsafe snow access, damaged glass, foundation settlement, concealed moisture, chimney issues, or any water affecting electrical equipment.
Editorial Review and Primary Sources
This article was reviewed against current outdoor-sauna product and maintenance information on October 14, 2026. Roofing, snow load, finish, drainage, foundation, and inspection requirements vary by model and location. Follow the exact sauna manual, roof-system instructions, local code, and qualified structural or electrical guidance.
LeisureCraft year-round outdoor sauna maintenance guide
Harvia Solide outdoor sauna roof-package guidance
SaunaLife outdoor sauna roof and drainage documentation
Patio Thermo outdoor sauna installation and snow guidance
Thermory sauna wood maintenance guidance
Internal Linking Note
Link this guide to outdoor sauna foundations, gravel and paver bases, deck installations, placement, permits, maintenance, Thermowood versus cedar, panoramic glass, troubleshooting, electrical requirements, and lifespan. Keep this page focused on exterior weather defense and seasonal moisture management.
Final Thoughts
The reliable way to protect outdoor sauna from weather is to control water from roof to ground. A durable roof sheds rain and snowmelt, flashing and gutters direct it, the foundation stays level and dry, approved finishes slow weathering, and ventilation lets the structure recover from both storms and sauna use.
Snow requires its own plan because it adds structural load, blocks vents, damages gutters, creates ice, and produces concentrated spring melt. Confirm the roof's intended conditions, inspect after major events, remove accumulation only with safe non-damaging methods, and keep cleared snow away from walls and foundations.
Seasonal inspection is the final layer. Small defects in roof edges, finish, door alignment, drainage, sealant, or foundation support are inexpensive to correct early and costly after concealed wood remains wet. Record what was installed, coated, adjusted, and repaired so future maintenance follows the same compatible system.
Our Recommendation
Before winter or a rainy season, inspect the sauna from roof to foundation in one continuous water path. Confirm the permanent roof, flashing, gutters, downspouts, glass and door details, grade, base separation, vents, exterior finish, and safe access. Test drainage with natural rain or a controlled method that does not force water into joints.
Use only Rodeo Wellness or component-manufacturer-approved finishes, sealants, covers, and roof repairs for the exact model and wood. Do not wrap the cabin tightly, seal drainage openings, block ventilation, or pile snow against the structure. Have roof, structural, chimney, and electrical concerns handled by the appropriate qualified professional.
For long-term ownership, schedule spring and fall inspections plus checks after major storms. Prioritize bulk-water control and drainage before cosmetic refinishing. A sauna that remains level, roofed, drained, ventilated, and easy to inspect will usually withstand weather far better than one repeatedly coated while water continues reaching the base or concealed joints.


 OUR BEST SELLERS