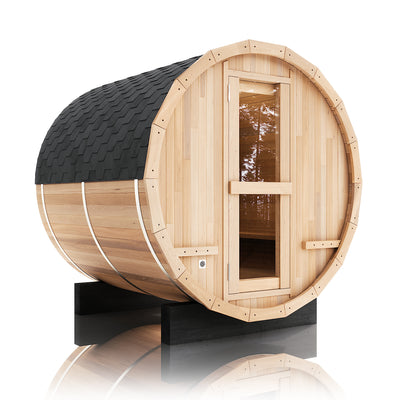
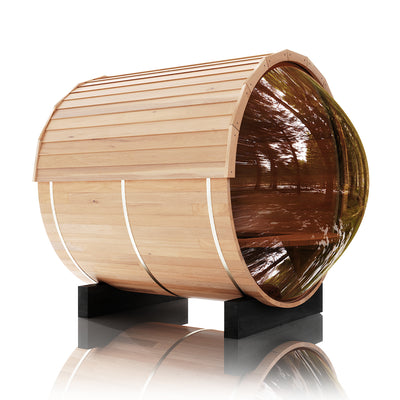
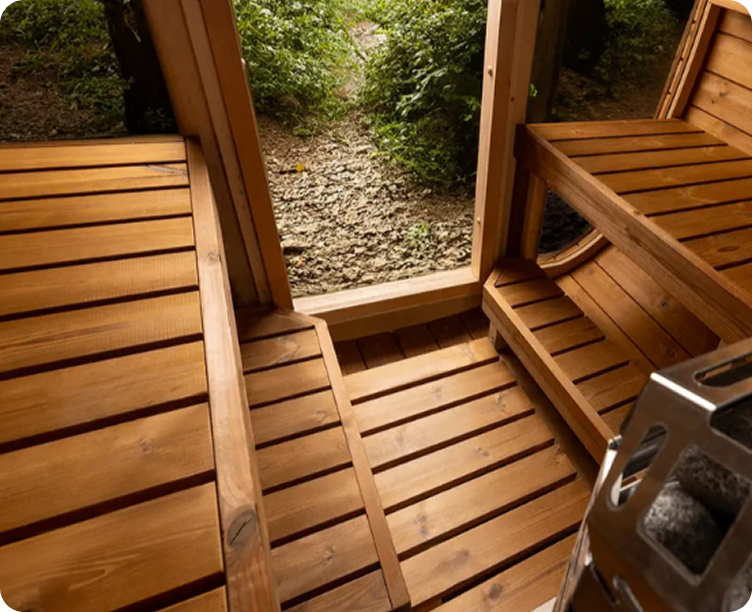
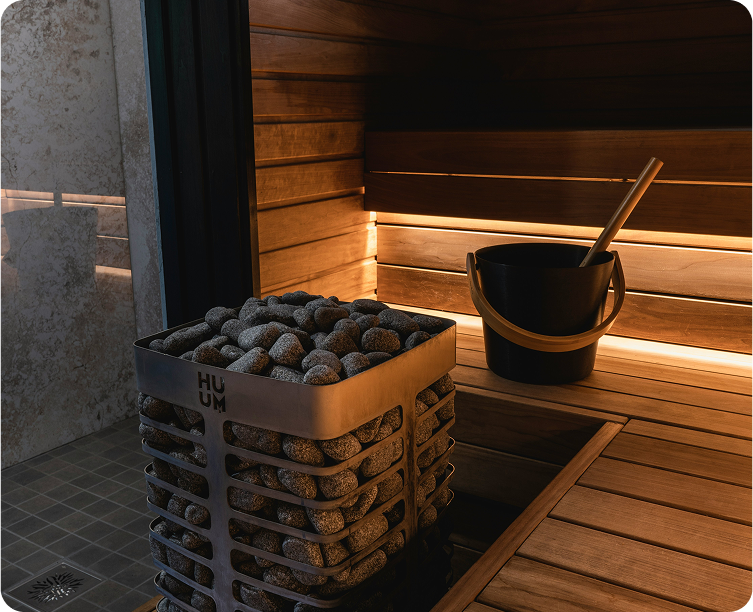
The natural cedar scent may soften over time as volatile compounds dissipate. Strong cleaning chemicals do not restore it and can replace it with residue. Light sanding of a clean, dry surface may briefly refresh aroma, but should be done for surface condition rather than scent alone.
Prepare the Sauna Before Cleaning
Turn the heater off, allow stones and metal to cool completely, and follow the manual for electrical isolation if cleaning near equipment. A heater can remain hot long after the air feels comfortable. Keep water and tools away from electrical enclosures, sensors, controllers, lights, and wiring.
Increase visibility without using an unsafe temporary lamp. Remove accessories and identify which pieces can be taken out. Vacuum or sweep before introducing moisture; otherwise dust becomes muddy and spreads into grain. Photograph unusual stains, leaks, mold-like growth, loose boards, and electrical discoloration before cleaning them away.
Read labels on any existing cleaner or protectant. Do not mix products. If the interior was previously oiled, waxed, sealed, or stained, contact the manufacturer because cleaning and sanding can produce uneven absorption or expose untreated patches.
Gather Simple Tools
A vacuum with a soft brush attachment, microfiber or lint-free cloths, a soft natural- or nylon-bristle brush, two small buckets, clean towels, and approved cleaner are sufficient for most work. Reserve these tools for the sauna so they do not carry kitchen grease, bathroom chemicals, or exterior coatings.
Protect the Heater and Controls
Never spray cleaner toward the heater, stones, sensor, controller, lights, or vents. Do not wrap a heater in plastic and then forget to remove it. Use controlled cloth application and keep the system off until the room and equipment surroundings are dry.
Create a Drying Plan First
Know how the cabin will dry before adding water. Confirm vents are clear, outside conditions are suitable, and the recommended residual-heat or door position can be used. Cleaning during a cold humid period may require more time than cleaning on a dry day.
Before cleaning, confirm:
-
The sauna is cool: Heater, stones, guards, lights, glass, and metal are safe to approach.
-
Power and water are controlled: No spraying occurs near electrical components, and qualified service is used for water exposure inside equipment.
-
Products are approved: Cleaner, interior protectant, abrasive, and cloth are compatible with the exact cedar and any factory finish.
-
Loose soil is removed: Dust, hair, leaves, grit, and stone fragments are vacuumed or swept before damp cleaning.
-
The room can dry: Vents, drainage, weather, and the model-specific drying routine are ready before the first cloth is wetted.
After-Every-Session Cedar Care
The best cleaning program is preventive. Ask each bather to sit and place feet on a clean towel. This protects upper and lower benches from perspiration, skin oils, cosmetics, and dirt. Towels should not cover heater guards, vents, sensors, or clearances, and they must be removed immediately after use.
Once the session ends and surfaces can be approached safely, remove wet accessories, empty the water bucket, and wipe pooled water or heavy perspiration from benches and floors. Do not leave damp seat pads inside to dry on the cedar; moisture remains trapped beneath them.
Use the cabin's drying instructions. Some manufacturers recommend a short period of residual heater operation and sufficient ventilation, while door and vent positions vary by product and climate. Drying is complete when surfaces and removable components are no longer damp, not merely when the air feels warm.
Use Bench Towels
A full-size towel should separate skin from the sitting area, and another can protect the foot bench. Replace towels between users in shared settings. This simple habit reduces dark contact marks more effectively than stronger cleaners applied later.
Remove Water and Accessories
Empty and dry buckets and ladles. Remove fragrance containers, leaves, salt products, footwear, and anything that can leak, rust, stain, or block airflow. Never dry laundry in the sauna because it adds moisture and can create a fire hazard.
Allow Complete Drying
Keep exterior vents clear of snow, leaves, or insects. Wipe glass condensation before it saturates wood at the sill. If the room routinely remains damp for many hours, investigate ventilation, drainage, roof leaks, or the drying sequence rather than compensating with fragrance.
Routine Cleaning Step by Step
Routine cleaning frequency depends on use. A private sauna used a few times per week may need a light wipe after sessions and a more thorough wash monthly or as soil appears. Heavy household or commercial use requires more frequent cleaning and may be governed by sanitation rules. Calendar frequency matters less than visible soil, contact intensity, and drying performance.
Work from cleanest and highest areas toward the floor, but avoid unnecessarily washing ceilings and walls that are not soiled. Concentrate on benches, backrests, hand-contact areas, door handles, floor grids, and the floor. Use minimal solution and change water when it becomes dirty rather than redistributing residue.
Apply cleaner to the cloth or brush instead of spraying the room. Agitate gently with the grain, wipe away loosened soil, then remove product residue with a clean damp cloth if the cleaner requires it. Finish by drying surfaces and the room.
Step One Vacuum or Sweep
Remove grit from bench joints, beneath removable pieces, around the heater perimeter without disturbing stones, and along walls. Fine grit under a cloth acts like sandpaper and can scratch soft cedar.
Step Two Test the Cleaner
Dilute and use the product exactly as directed. Test a hidden area, allow it to dry fully, and inspect color, odor, raised grain, and residue. A wet test can look acceptable and reveal a mark only after drying.
Step Three Clean with the Grain
Use light, even pressure and overlap strokes so the cleaned area does not become a bright spot. Give contact surfaces more attention than untouched upper walls. Do not soak joints or repeatedly flood stubborn marks.
Step Four Remove Residue
Follow the cleaner directions. If a clean-water wipe is required, wring the cloth well and repeat until the surface no longer feels soapy. Residue can attract dirt, change appearance, and become noticeable when heated.
Step Five Dry and Inspect
Blot water, return airflow, and let all sides of removable boards dry. Inspect again under dry conditions. Reinstall only when surfaces, fasteners, and floor areas are dry and stable.
Choosing Gentle Cleaning Products
The safest choice is the sauna manufacturer's own cleaner or a product specifically approved for hot-room wood. A mild, low-residue soap may also be accepted by some manufacturers. Use the weakest approved concentration that removes the soil and never assume that natural, plant-based, food-safe, or eco-friendly labeling makes a product suitable for heated cedar.
Ingredients, fragrances, dyes, solvents, disinfectants, and alkalinity can alter wood or leave residue. Product recommendations also change depending on whether cedar is bare or treated. When instructions conflict, follow the cabin manufacturer first and test discreetly.
Household recipes should be treated cautiously. Diluted vinegar is suggested by some sauna makers for certain mineral haze or mold-related cleaning, while other finishes and metal components may be sensitive to acid. Baking soda can act as an abrasive and leave alkaline residue. Use either only when specifically approved for the surface and problem.
Sauna-Specific Cleaner
These products are formulated with the environment in mind, but they still require correct dilution, rinsing or wiping, ventilation, and drying. A sauna label is not permission to mix products or saturate wood.
Mild Soap
Choose an unscented or lightly scented product accepted by the manufacturer, use very little, and remove residue. Avoid dish products with heavy degreasers, moisturizers, dyes, or perfume unless explicitly approved.
Clean Water
For fresh perspiration and routine wiping, warm clean water may be sufficient. Hard water can leave mineral marks, particularly on dark hardware and glass. Use the water quality recommended by the manufacturer where mineral buildup is significant.
Disinfectants
Private residential saunas generally do not need aggressive hospital-style disinfection after normal use. Shared or commercial facilities may have regulatory sanitation requirements; operators should use products and processes approved for both those rules and the sauna materials.
Cleaning Cedar Benches and Backrests
Benches receive the greatest concentration of sweat, oils, and physical wear. Inspect top surfaces, front edges, joints, undersides, supports, fasteners, and backrests. Removable benches should be handled according to the assembly instructions and supported safely during cleaning.
Clean the entire affected board or seating plane evenly rather than scrubbing one small spot aggressively. Spot cleaning can create a pale halo. Work with the grain, minimize water, and use a separate clean cloth for the final wipe.
Bench undersides matter because they can collect dust and remain damp where airflow is weak. They usually need less frequent cleaning than the tops but should be inspected during deeper service. Loose boards, protruding fasteners, splinters, or structural movement require repair before use.
Sweat Marks
Start with approved mild cleaner and a soft brush. If discoloration remains after drying, light sanding may remove the affected surface. Deep discoloration can be permanent or may require professional refinishing; do not keep cutting into the board indefinitely.
Body-Oil and Cosmetic Residue
Oils can penetrate cedar and attract soil. Clean promptly with the approved method. Ask bathers to remove makeup, lotions, tanning products, and oily hair treatments before entering, because prevention is easier than extraction.
Bench Edges and Splinters
Light hand sanding can smooth raised fibers while preserving the rounded profile. Sanding through an edge or creating a sharp corner makes the bench less comfortable and can expose a different color. Replace damaged boards when surface correction would remove too much material.
Protect benches through simple habits:
-
Use clean towels: Cover sitting and foot-contact zones without blocking vents or heater clearances.
-
Remove textiles promptly: Never leave damp towels, pads, or robes on cedar after the session.
-
Wipe fresh spills: Address sweat, cosmetics, beverages, fragrance, and mineral water before they penetrate or dry.
-
Rotate removable pieces only as approved: Equalize wear without reversing boards into an unsafe orientation or exposing unfinished hardware.
-
Inspect structure: Tighten or repair supports and fasteners according to the manufacturer before a loose bench becomes hazardous.
Walls Ceilings Floors and Glass
Walls and ceilings typically receive less direct soil than benches. Clean them only as needed, focusing on hand-contact areas, splash zones, visible dust, and stains. Excessive overhead washing increases the chance of liquid reaching lights, sensors, wiring, and concealed joints.
The floor material determines the cleaning method. Waterproof tile, sealed concrete, removable wood grids, and cedar flooring have different requirements. A method appropriate for a drained commercial tile floor can damage a wood-floored outdoor cabin. Follow the floor and drain documentation.
Glass cleaner should never be sprayed so broadly that it lands on cedar, benches, stones, or heater components. Apply it to a cloth where possible, control drips, and wipe frames and sills dry. Use a product compatible with tinted, coated, laminated, or specialty panoramic glass.
Cedar Wall Panels
Use a nearly dry cloth and mild approved solution on visible soil. Work from bottom of the stain toward the center to limit runs, then blend the surrounding board lightly if necessary. Do not use steam cleaners or hose water into tongue-and-groove joints.
Ceilings
Clean ceilings infrequently and only when safely accessible. Never stand on benches that are not designed as work platforms. Heat-darkened areas above a heater may need a clearance, stone, ventilation, or dust investigation rather than cosmetic scrubbing.
Removable Floor Grids
Lift them according to the manual, clean both sides with controlled moisture, and dry them upright or as recommended. Clean the waterproof floor or drain beneath using the product appropriate to that material, then let every surface dry before replacement.
Glass and Hardware
Protect wood from glass-cleaner runoff and dry metal hardware. Inspect corrosion, loose hinges, and failed seals while cleaning. Do not oil hardware with a product that can drip onto hot cedar unless it is manufacturer approved.
Removing Stains Without Overcleaning
Identify the stain before choosing a method. Sweat and body oil appear in contact zones; hard-water marks follow drips; rust originates near metal; smoke or scorching follows heat paths; mold-like growth correlates with persistent moisture. Treating every dark mark as dirt can hide a leak, clearance issue, or biological problem.
Begin with the least aggressive approved cleaner and allow the area to dry fully before judging it. Wet cedar becomes darker, and immediate inspection can make a successful cleaning look unsuccessful. Repeat gentle cleaning only when the instructions permit it.
If color remains but the surface is clean, decide whether the mark is acceptable patina. Uniform aging is often better than an over-sanded bright patch. Deep stains may not be removable without replacing a board.
Perspiration Stains
Clean evenly across the board or seating section. Persistent marks can often be reduced with fine sanding. Improve towel use and drying so the same area does not darken immediately again.
Water and Mineral Marks
Determine whether the source is cleaning water, ladle splash, glass condensation, roof leakage, or hard water. Correct the source before repeated spot treatment. Use only a mineral-removal method approved for both cedar and nearby metal or glass.
Rust Stains
Locate the corroding fastener or accessory. Cleaning the brown mark without replacing incompatible or damaged hardware leads to recurrence. Fastener replacement should match the structural and corrosion specification.
Heat Darkening
Darkening above the heater can be ordinary dust carried by hot air, normal aging, or evidence of excessive heat. Check clearances, sensor, stones, guards, and ventilation. Char, blistering, or rapid change requires immediate professional assessment.
How to Sand Cedar Safely
Sanding is a restoration step, not the first cleaning method. Use it when a clean, completely dry surface remains stained, rough, or lightly splintered and the manufacturer permits sanding. Fine paper—often somewhere around 120 to 220 grit depending on the instructions and condition—removes a thin surface layer with less risk than coarse abrasive.
Sand by hand with the grain and light, even pressure. Feather a reasonable area so the repair does not become a sharply defined pale circle. Maintain bench curves and edges. Avoid powered sanding unless the manufacturer or skilled refinisher recommends it; power tools can remove soft cedar quickly and scatter dust into electrical and ventilation components.
Vacuum dust thoroughly with a soft attachment, then wipe as directed without saturating the freshly opened grain. Do not operate the heater until airborne dust is gone, surrounding equipment is clean, and surfaces are dry. Cedar dust should not be allowed to accumulate near heater elements.
Choose the Smallest Repair
A localized rough area may need only a few light passes. A uniformly aged bench may look better when the entire seating surface is refinished consistently. Stop before exposing screws, changing thickness materially, or weakening a board.
Protect Yourself from Dust
Use suitable respiratory, eye, and skin protection, control dust, and ventilate according to the abrasive and workplace guidance. Cedar dust can irritate sensitive people. Keep other occupants away until cleanup is complete.
After Sanding
Whether to apply an interior protectant depends on the sauna. Some makers prefer bare cedar; others approve a specific sauna oil or paraffin-based treatment. Never substitute cooking oil, ordinary mineral oil, polyurethane, deck stain, or exterior sealer without written approval.
Odor Control and Musty Smells
Odor is a diagnostic clue. Fresh cedar aroma is normal, while sour, musty, rancid, smoky, chemical, or electrical smells point toward different causes. Masking odor with fragrance, essential oil, incense, or spray makes diagnosis harder and may contaminate hot surfaces.
Start by removing wet textiles, buckets, leaves, fragrance containers, and floor grids. Clean contact surfaces and the floor, inspect drains and concealed corners that are safely accessible, clear vents, and dry the cabin. If odor returns despite dry conditions, investigate roof leakage, foundation moisture, wall cavities, contaminated accessories, or inappropriate prior coatings.
A burning or electrical odor is not a cleaning problem. Turn the heater off, stop use, and arrange qualified service. Likewise, smoke staining from a wood-burning system requires chimney, draft, fuel, and appliance review before cosmetic cleaning.
Perspiration Odor
Improve towel use and clean benches, backrests, floor grids, and floor with approved products. Check undersides and joints where residue collects. More frequent light cleaning is safer than occasional aggressive chemical treatment.
Musty Odor
Persistent dampness is usually the root cause. Verify post-session drying, vent clearance, roof and glass leaks, ground drainage, and whether wet accessories remain inside. Professional moisture assessment may be necessary if concealed wood is affected.
Fragrance Residue
Apply sauna fragrances only in the manner approved by the heater and product makers, usually diluted and never directly on cedar or elements unless specified. Spilled concentrate can leave oil stains and persistent scent requiring specialized advice or sanding.
Animal or Pest Odor
Inspect exterior vent screens, roof, foundation, and service gaps. Remove contamination safely, repair the entry route, and replace porous materials that cannot be cleaned appropriately. Avoid poison or pesticide use inside the hot room without professional guidance.
Mold-Like Growth and Persistent Moisture
Cedar is naturally durable but can still support mold when moisture, nutrients, and insufficient drying persist. Not every dark mark is mold; tannin, rust, dirt, and heat darkening can look similar. Large, recurring, concealed, or health-sensitive contamination should be assessed by a qualified professional rather than scrubbed blindly.
If a small surface condition falls within manufacturer cleaning guidance, isolate the cause first, use the approved non-bleach method, minimize water, and dry completely. LeisureCraft advises against bleach on cedar because harsh products can gray or damage the wood. Other manufacturers may specify different products, so model guidance controls.
Growth returning after cleaning indicates unresolved moisture. Inspect ventilation, drying, roof and window leaks, floor drainage, ground moisture, and wet accessories. Replacing a stained board without correcting the environment simply resets the cycle.
When to Stop DIY Cleaning
Escalate when the affected area is extensive, returns quickly, involves soft or deteriorated wood, lies inside walls or ceilings, follows flooding, reaches electrical equipment, or causes symptoms. Professional remediation can determine whether materials need removal.
Do Not Mix Chemicals
Combining bleach, acids, ammonia, peroxide, or household cleaners can release hazardous gases and damage cedar and metal. Use one approved product exactly as labeled, with the required ventilation and personal protection.
Document the Moisture Source
Photograph staining before cleaning and record whether it follows sauna use, rain, snowmelt, cleaning, or prolonged closure. Track drying time and humidity conditions. This evidence helps separate an operating issue from an envelope leak.
Drying the Sauna After Cleaning
Cleaning is not finished until the cedar is dry. Wipe visible water, empty containers, expose all sides of removable pieces, clear vents, and follow the heater manufacturer's drying guidance. Do not leave a heater operating unattended or use remote start while cleaning supplies, tools, or textiles remain inside.
Cold outside air does not always dry effectively. Harvia notes that sauna drying requires heater heat and sufficient ventilation and provides climate-sensitive guidance for vent and door use. The cabin's exact routine should control because outdoor humidity, mechanical exhaust, gravity ventilation, and construction vary.
Do not accelerate drying with a portable unapproved heater, open flame, heat gun, or fan placed where it violates clearances or electrical suitability. Controlled sauna heat and designed airflow are safer than improvisation.
Dry Removable Components Separately
Seat pads, headrests, floor grids, buckets, and ladles should dry on all sides before returning. Placing a damp grid onto a dry floor recreates the moisture pocket that cleaning was meant to eliminate.
Verify Before the Next Session
Smell the cool room, touch representative surfaces with clean dry hands, and inspect corners and undersides. Any remaining cleaner odor, dampness, residue, or electrical concern should be resolved before heating.
Track Slow Drying
If the same area remains damp repeatedly, mark and photograph it. Check ventilation, leaks, condensation, foundation conditions, and material contact. Slow drying is a building or operating clue, not a reason to add stronger fragrance.
Substances and Methods to Avoid
Avoid products that can damage cedar, leave heated residue, add excessive water, or create incompatible chemistry. Manufacturer instructions override generic advice, but several categories are consistently risky: bleach, ammonia, petroleum solvents, strongly perfumed disinfectants, abrasive powders, pressure washing, steam cleaning, and ordinary exterior coatings on interior surfaces.
Avoid improvising with cooking oils. They can oxidize, become rancid, attract dirt, and alter heat behavior. Ordinary furniture polish, polyurethane, varnish, lacquer, deck stain, and waterproof sealer can create films or fumes inappropriate for direct-contact hot-room wood.
Also avoid mechanical shortcuts. Steel wool can leave fragments that rust; wire brushes scar cedar; coarse sanding removes too much material; a hose can soak cavities and electrical equipment. The gentlest effective method is usually the safest and most professional.
Do not use these without explicit manufacturer approval:
-
Bleach or ammonia: These can discolor cedar, damage fibers or hardware, leave residue, and create dangerous chemistry if mixed.
-
Pressure washers hoses or steam cleaners: They force excessive moisture into soft wood, joints, cavities, and electrical areas.
-
Petroleum solvents and heavy degreasers: Residue and odor can become objectionable or irritating when heated.
-
Ordinary paint varnish polyurethane or deck sealer: Interior heat and moisture require sauna-specific treatment decisions.
-
Coarse abrasives or wire tools: They gouge earlywood, alter bench shape, raise splinters, and can deposit metal fragments.
Interior Cedar Versus Exterior Cedar
Interior and exterior cedar have different exposures. Interior surfaces face heat, steam, skin contact, and the possibility of heated residue. Exterior surfaces face UV, rain, snow, and dirt. A product designed to preserve exterior color is not automatically safe on benches and walls.
Many cedar-sauna manufacturers allow the interior to remain bare or permit only a specific penetrating sauna treatment on selected surfaces. The exterior may be left to weather or protected with an approved penetrating finish. Keep separate labeled tools for the two jobs so exterior stain never contaminates interior cloths or brushes.
When cleaning an outdoor sauna, prevent exterior wash water from entering vents, doors, roof joints, or foundation details. Correct weather leakage before treating interior stains. A recurring mark after rain is not an interior hygiene problem.
Exterior Graying
Silver-gray exterior cedar is often UV weathering rather than rot. Cleaning should remove soil without attempting to bleach it back to new color. Restoration may require controlled sanding and an approved exterior finish.
Interior Patina
Even interior cedar changes color. Uniform mellowing can be attractive and does not need correction. Focus on hygiene, smoothness, dryness, and structural condition rather than perfect color uniformity.
Cross-Contamination
Never use a brush that carried deck cleaner, mold chemical, paint stripper, or exterior stain inside the sauna. Store chemicals outside the cabin and protect them from temperature extremes according to their labels.
A Practical Cedar Sauna Cleaning Schedule
Cleaning frequency should reflect use, number of bathers, towel habits, climate, and drying. A low-use private sauna can stay clean with disciplined after-session care and periodic washing. A busy household, rental, gym, or hospitality sauna needs more frequent documented sanitation and may have regulatory requirements.
Build the schedule around observations rather than allowing stains and odor to set. Light cleaning performed early removes less cedar than delayed aggressive sanding. Pair every cleaning interval with a drying and safety inspection.
Keep a simple log of cleaning product, dilution, areas treated, sanding, approved oil or protectant, stains, odor, leaks, vent condition, and repairs. This record prevents incompatible product changes and helps support evaluate recurring issues.
After Every Use
Remove textiles and accessories, empty buckets, wipe pooled water or heavy perspiration, and complete the approved drying routine. Check that vents and the door function as intended.
Weekly or Monthly
Depending on use, vacuum or sweep, wipe contact surfaces, clean floor grids and the floor, inspect undersides, and address fresh spots. Shared-use facilities may need much shorter intervals.
Seasonally
Deep-clean accessible surfaces, inspect benches and fasteners, clear vents, review glass and door hardware, check odor and drying time, and investigate weather-related moisture. Rotate seasonal work so no area is neglected.
Annually or as Needed
Evaluate light sanding, approved interior treatment, heater-stone service, structural repairs, and professional moisture or electrical inspection. Annual does not mean waiting a year when a safety or leak issue appears.
A complete cleaning record includes:
-
Date and usage level: Note whether cleaning follows normal household use, guests, rental turnover, a spill, or long storage.
-
Products and dilution: Record exact cleaner, concentration, lot if relevant, test location, rinse requirement, and drying time.
-
Surface work: Identify benches, backrests, walls, floor grids, glass, sanding grit, and any approved protectant.
-
Condition findings: Track stains, roughness, odor, damp areas, leaks, loose parts, corrosion, and ventilation blockage.
-
Follow-up: Record repairs, professional referrals, product-support advice, and the result after the next heated session.
Frequently Asked Questions
How Do You Clean a Cedar Sauna
Let it cool, remove loose debris, wipe contact surfaces with warm water and an approved mild or sauna-specific cleaner, remove residue, minimize water, and dry the room completely.
What Is the Best Cleaner for Cedar Sauna Wood
The safest option is the sauna manufacturer's approved cleaner. A mild low-residue soap may be acceptable for some bare cedar, but always test and follow the exact cabin guidance.
Can I Use Vinegar in a Cedar Sauna
Only when the manufacturer approves it for the specific stain and surrounding materials. Acid can affect finishes, metals, stone, and sealants, so generic vinegar recipes are not universally safe.
Can I Use Bleach on Cedar Sauna Benches
Avoid bleach unless the sauna manufacturer gives a specific approved procedure. It can gray or damage cedar, affect hardware, leave residue, and create hazardous reactions if mixed with other cleaners.
Can I Pressure Wash a Cedar Sauna
Do not pressure wash the interior. High-pressure water erodes soft wood and forces moisture into joints, cavities, and electrical equipment. Exterior use also requires explicit manufacturer permission.
Can I Hose Down the Sauna Interior
Generally no. Use controlled damp-cloth cleaning and the floor method specified for the model. A hose can saturate wood and reach heater or lighting components.
How Often Should a Cedar Sauna Be Cleaned
Wipe and dry it after every use, then perform routine washing according to soil and usage—often weekly to monthly for a household. Shared facilities need more frequent sanitation.
How Do I Remove Sweat Stains from Cedar
Use an approved mild cleaner and soft brush first. After full drying, lightly sand with the grain if the manufacturer allows it. Protect benches with towels afterward.
What Grit Sandpaper Should I Use
Manufacturer guidance varies, but fine paper in approximately the 120–220 grit range is commonly recommended. Start finer when possible and remove the least wood needed.
Can I Use an Orbital Sander
Hand sanding gives better control on soft cedar. Use power sanding only with manufacturer or professional guidance, dust control, and protection for electrical and ventilation components.
Should Cedar Sauna Benches Be Oiled
Some manufacturers prefer bare cedar; others approve a sauna-specific penetrating treatment. Use only the exact approved product and never substitute cooking oil, deck oil, or ordinary furniture finish.
How Do I Prevent Cedar Sauna Stains
Sit and place feet on clean towels, remove cosmetics and oily products, wipe spills promptly, remove damp textiles, and dry the cabin fully after every session.
Why Does My Sauna Smell Musty
Persistent moisture, wet accessories, blocked ventilation, drainage problems, or weather leakage are common causes. Clean and dry the cabin, then correct the moisture source if odor returns.
Can I Use Essential Oils to Remove Odor
No. Fragrance masks odor and can stain cedar or contaminate heater stones if used incorrectly. Diagnose and remove the underlying residue or moisture first.
How Do I Clean Mold from Cedar
Confirm the condition and moisture source. Use only the manufacturer's approved method for a small surface issue, and seek professional assessment for extensive, recurring, concealed, or health-sensitive growth.
How Do I Clean Sauna Walls
Clean only visible soil with a well-wrung cloth and approved mild solution, working with the grain. Avoid soaking panel joints, sensors, lights, vents, and heater areas.
How Do I Clean Under Sauna Benches
Let the sauna cool, remove components only as the manual allows, vacuum debris, damp-wipe accessible surfaces, inspect supports, and dry everything before reassembly.
Can Glass Cleaner Damage Cedar
Runoff can stain or leave residue. Apply compatible glass cleaner to a cloth, control drips, and immediately wipe adjacent cedar and frames as instructed.
Why Did My Cedar Turn Gray After Cleaning
Harsh alkaline products such as ammonia, bleach, over-wetting, or surface abrasion can change cedar color. Stop experimenting and contact the manufacturer before attempting restoration.
When Should Cedar Be Replaced Instead of Cleaned
Replace or professionally assess boards that are structurally weakened, deeply contaminated, persistently wet, badly splintered, charred, soft, or damaged around fasteners and supports.
Editorial Review and Primary Sources
This article was reviewed against current sauna-maintenance and cedar-care guidance on October 14, 2026. Cleaning products, finishes, sanding, ventilation, floors, and sanitation requirements vary by manufacturer and facility type. Follow the exact sauna and product manuals before using any cleaner or treatment.
Harvia sauna maintenance and drying guidance
LeisureCraft year-round cedar sauna maintenance guide
SaunaLife sauna care guide
Thermory sauna wood cleaning and maintenance guidance
KLAFS private sauna cleaning guidance
Internal Linking Note
Link this guide to outdoor sauna maintenance, cedar versus hemlock, Thermowood versus cedar, weather protection, ventilation, troubleshooting, heater-stone care, and sauna lifespan. Keep this page focused on interior cedar cleaning and stain prevention rather than exterior refinishing.
Final Thoughts
The safest answer to how to clean a cedar sauna is to use the least water, chemical strength, and abrasion necessary. Remove loose debris, clean contact surfaces with an approved mild product, remove residue, and dry the room completely. Prevention through towels and post-session drying does more for cedar than aggressive annual restoration.
Treat stains as clues. Sweat, body oil, hard water, rust, heat darkening, mold-like growth, and roof leakage require different responses. If gentle cleaning does not work, allow the wood to dry before deciding whether light sanding, professional assessment, or board replacement is appropriate.
Keep exterior coatings and household chemicals away from hot interior cedar unless the sauna manufacturer explicitly approves them. A clean sauna should smell neutral or naturally woody, feel dry and smooth, and reach temperature without cleaner odor. That result comes from routine care, good airflow, and compatible products—not from soaking or disinfecting the wood like a bathroom surface.
Our Recommendation
For Rodeo Wellness cedar saunas, use clean bench towels during every session, remove wet items immediately, and follow the supplied drying routine. For scheduled cleaning, begin with warm water, a soft cloth or brush, and the mildest sauna-approved cleaner. Apply solution to the tool rather than spraying the room, then remove residue and dry every surface.
Reserve fine hand sanding for clean, dry stains or rough areas that remain after washing. Work with the grain, remove minimal material, control dust, and use only the interior treatment approved for the exact cedar and cabin. Never use bleach, ammonia, pressure washing, a running hose, petroleum solvent, ordinary varnish, polyurethane, or exterior deck sealer inside without explicit written approval.
If odor, staining, or mold-like growth returns, investigate ventilation, post-session drying, roof and glass leakage, floor drainage, and damp accessories instead of increasing chemical strength. The best cleaning plan protects the cedar surface while correcting the moisture or usage condition that created the problem.



 OUR BEST SELLERS