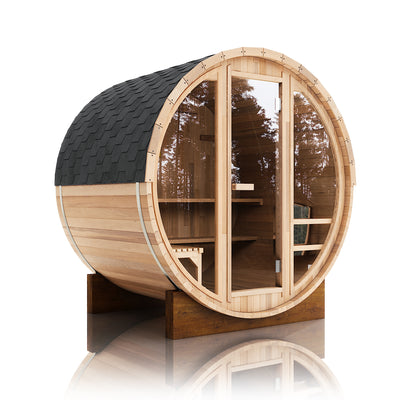
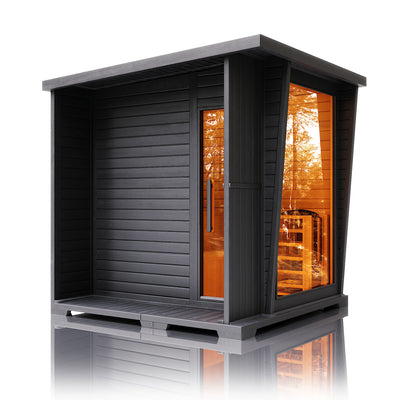
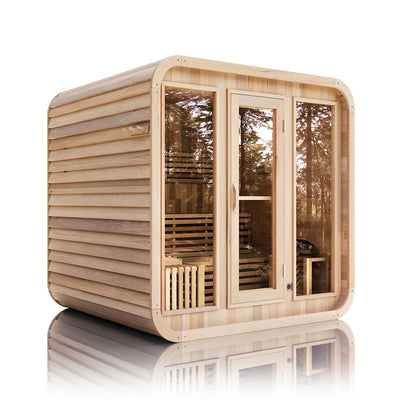
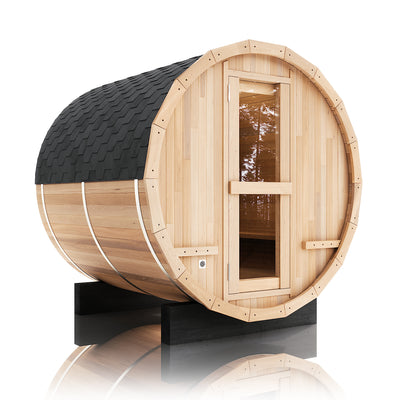
How hot does an outdoor sauna get? A properly designed traditional outdoor sauna commonly operates between about 160°F and 195°F, or approximately 71°C to 91°C, at the upper-bench level. Some users prefer milder sessions near 150°F, while experienced bathers may choose settings approaching 200°F when the heater, controls, room construction, and local rules permit. The practical goal is not to chase the highest number; it is to create stable heat, effective stone temperature, comfortable air circulation, and satisfying steam when water is applied to the stones.
Outdoor placement does not automatically make a sauna cooler. A correctly insulated cabin with an appropriately sized heater can reach traditional sauna temperatures in winter, but low ambient temperatures, wind, glass, air leakage, wet materials, and an undersized heater can extend warm-up or prevent stable performance. Temperature also changes vertically: the ceiling and sensor zone are hotter than the lower benches and floor, so two thermometers can report very different numbers while both are functioning correctly.
This guide explains traditional temperature ranges, perceived heat, heater capacity, winter performance, insulation, ventilation, sensor placement, warm-up time, and realistic ownership expectations. It also compares Rodeo Wellness configurations using Toule or Harvia 6 kW heaters and HUUM DROP 6 kW or 9 kW upgrades paired with the Wi-Fi UKU controller. Product selection and installation must always follow the exact manufacturer documentation, approved room-volume range, electrical requirements, clearances, sensor location, and local code.
Quick Answer
Most traditional outdoor saunas are used between 160°F and 195°F at the upper bench, with roughly 175°F to 190°F serving as a practical target for many owners. A sauna may be capable of higher controller settings, but the displayed setpoint, sensor reading, wall thermometer, and temperature at a person's shoulders are not interchangeable. Humidity from water on hot stones can make the room feel dramatically hotter even when the measured air temperature changes very little.
Expect a well-matched electric outdoor sauna to require roughly 30 to 60 minutes to become session-ready in moderate conditions, although the actual time can be shorter or much longer. Very cold weather, heavy glass, a large cabin, insufficient insulation, an open door, poorly arranged stones, or a heater at the edge of its rated capacity can extend the process. A larger heater does not excuse poor construction and should never be installed outside its approved room range.
|
Operating Factor
|
Typical Effect
|
What the Owner Should Expect
|
| Traditional air temperature |
Commonly about 160–195°F at upper-bench level |
Comfort depends on humidity, airflow, bench height, and personal tolerance |
| 6 kW electric heater |
Common compact-sauna capacity when the room volume is correctly matched |
Efficient performance in smaller rooms; limited reserve if glass or leakage is underestimated |
| 9 kW electric heater |
More capacity for an approved larger or glass-heavy room |
Potentially stronger recovery and cold-weather reserve, not permission to oversize |
| Cold outdoor climate |
Increases shell losses and warms the structure more slowly |
Longer preheat is normal; stable temperature should follow once the cabin is heat-soaked |
| Water on stones |
Raises perceived heat through a short humidity pulse |
The session can feel more intense without a major thermometer increase |
| Sensor position |
Controls what the system reads and when it cycles |
Incorrect placement can cause low heat, overshoot, nuisance shutdown, or unsafe operation |
Traditional Outdoor Sauna Temperature Ranges
Traditional sauna is a high-temperature, relatively low-humidity bathing method in which water can be applied to heated stones to create a brief burst of steam, or löyly. Harvia describes ordinary electric-sauna use at higher settings such as 80°C to 100°C, equivalent to 176°F to 212°F, for certain systems. That manufacturer example establishes the broad capability of traditional equipment, but it should not be treated as a universal prescription for every cabin, control, jurisdiction, or user.
Many residential users find 160°F to 190°F more practical. Beginners may start near the lower end, remain for a shorter interval, and increase heat only after learning how their body responds. Experienced users often prefer a hotter room with measured water application, while others choose a lower air temperature and more frequent steam. Neither style is inherently superior when the equipment is used correctly.
A number on the controller is only one part of the experience. Wood surfaces, stones, benches, and the user's body continue absorbing heat after the air first reaches its setpoint. A room that has just touched 180°F can feel less settled than one that has remained near 175°F long enough for the benches and walls to warm. This is why session readiness is better judged by heat stability and stone performance than by the first appearance of a target number.
Mild Traditional Sauna Sessions
A range around 140°F to 160°F can suit first-time users, longer gentle sessions, families with different preferences, and anyone who finds high heat oppressive. The room still needs hot stones and controlled ventilation; lowering the thermostat does not convert a traditional sauna into an infrared cabin. Water applied carefully to the stones can add intensity without requiring a very high air temperature.
Owners should resist compensating for a mild setting by extending a session without limit. Time and temperature interact, and personal factors matter. Leave immediately for dizziness, nausea, weakness, headache, confusion, chest discomfort, or any unusual symptom, and follow professional medical guidance for individual health conditions.
Classic Finnish-Style Heat
The middle and upper part of the traditional range—often around 160°F to 195°F—delivers the dry, enveloping heat most buyers expect. The upper bench should sit in the hot zone while feet remain high enough to avoid a sharply colder lower layer. A balanced room makes the temperature gradient usable instead of forcing bathers to choose between an overheated head and cold feet.
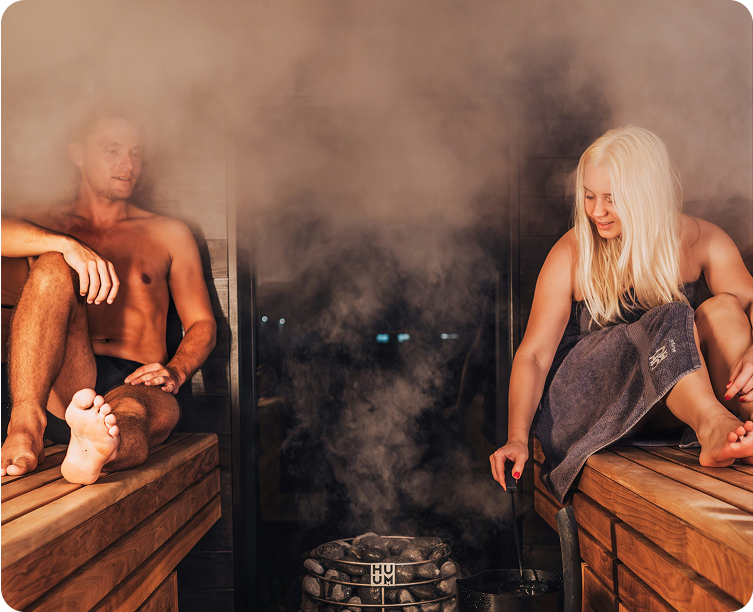
Löyly changes perceived temperature quickly. Water evaporating from adequately heated stones increases humidity around the bathers, reduces the body's ability to cool by evaporation, and produces an immediate wave of heat. The controller may show little change because the effect is temporary and because its sensor is measuring a different location.
Very Hot Settings
Settings near or above 200°F are not a required benchmark of quality. Control limits, local safety standards, heater listings, sensor placement, and manufacturer instructions differ. Very high air temperatures can shorten comfortable session time and make touching hardware, leaning on walls, or applying too much water less forgiving.
A sauna that cannot exceed an owner's arbitrary target may be functioning exactly as designed. Before changing sensors, controls, or heater components, compare the actual room volume, uninsulated surfaces, electrical supply, ventilation, stone loading, and manual requirements. Never relocate or bypass an overheat sensor to obtain a higher reading.
Choose a target range by considering the complete bathing experience:
-
Upper-bench temperature: Measure where the head and shoulders are located rather than relying only on a low wall thermometer.
-
Heat stability: Allow the benches, walls, and stones to absorb heat so the room recovers after the door opens or water is applied.
-
Humidity response: Judge whether a modest ladle of water produces clean, comfortable steam instead of weak evaporation or harsh splashing.
-
Personal tolerance: Start conservatively, shorten sessions when needed, and never use another person's preferred temperature as a requirement.
-
Equipment limits: Stay within the heater, controller, sensor, room-volume, electrical, and local safety requirements.
Why the Same Sauna Has Several Temperatures
Heat rises, but a sauna is more complex than a single hot layer. The heater creates buoyant air movement, ventilation supplies and removes air, the walls absorb and release energy, and water vapor moves through the room. The result is a vertical temperature gradient. Air near the ceiling can be substantially hotter than air near the floor, while the upper bench occupies the most useful bathing zone.
Thermometer readings vary because instruments are installed at different heights and distances from the heater, door, glass, and vents. A controller sensor is a safety and regulation component, not necessarily a comfort thermometer. A decorative dial near the door can read lower than the sensor, while a digital probe close to the ceiling can read higher than the temperature at a seated user's shoulders.
Owners sometimes interpret these differences as a defective heater. The better diagnostic question is whether each instrument is measuring the same location under the same conditions. Compare readings only after the sauna has stabilized, keep the door closed, and avoid taking measurements immediately after a large steam burst.
Ceiling and Sensor Zone
The hottest air generally accumulates high in the room. Manufacturers specify where a control sensor must be mounted relative to the heater and ceiling so the system responds predictably and the overheat protection functions. That location may intentionally read hotter than the bench zone.
Moving the sensor lower can keep the heater energized longer and create excessive temperatures near the ceiling or heater. Moving it into a cool draft can have a similar effect. Conversely, placing it in an abnormally hot corner or above the wrong part of the heater can cause premature cycling and disappointing bench temperatures.
Upper Bench and Lower Bench
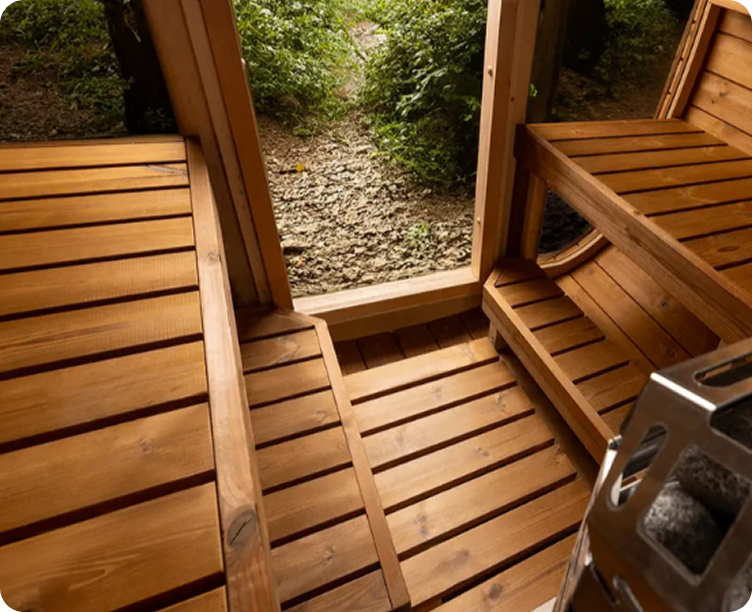
Upper-bench height is central to comfort. If bathers sit too low, much of their body remains below the best heat zone even when the ceiling sensor reports a high number. Good design places the feet and torso sufficiently high while maintaining required ceiling clearances and safe access.
A lower bench is useful for cooling, entering, and accommodating different preferences, but it should not be used as the sole reference for heater performance. A sauna can read 130°F low in the room while delivering traditional heat at shoulder height on the upper bench.
Glass Door and Window Zone
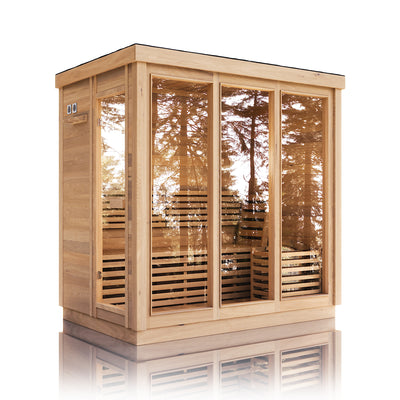
Glass loses heat faster than an insulated wood wall. Air beside a panoramic window or glass door can feel cooler, particularly during wind or deep cold. Manufacturers commonly require uninsulated glass and masonry surfaces to be added to the calculated room volume so heater capacity reflects that extra heat loss.
The effect is not limited to the final temperature. Large glass areas can extend warm-up, increase cycling, and create radiant asymmetry: one side of the body faces a warmer interior while the other faces a cold surface. Correct sizing and thoughtful bench placement reduce that sensation.
Heater Capacity and Room Volume
Heater output is measured in kilowatts, but kilowatts alone do not predict sauna temperature. The heater must be matched to the effective room volume specified by its manufacturer. Interior cubic volume is the starting point; glass, tile, masonry, logs, ceiling height, insulation quality, and outdoor exposure may increase the calculated heating load.
The HUUM DROP manual, for example, lists model-specific room-volume ranges and instructs owners to account for uninsulated brick, tile, or glass surfaces. That principle matters because a compact glass-front cabin can demand more heating capacity than its dimensions suggest. The correct calculation must use the manual for the exact regional model, voltage, and installation.
Undersizing usually appears as very long warm-up, continuous operation, slow recovery after the door opens, weak stone performance, or failure to maintain the desired bench temperature during cold weather. Oversizing can produce rapid air heating before the stones and room mass are ready, short cycling, harsher temperature swings, and noncompliance with the heater's minimum approved room volume.
Toule or Harvia 6 kW Standard Heater
Rodeo Wellness uses Toule or Harvia 6 kW heaters in applicable configurations. A 6 kW unit is a practical match for many compact residential saunas when the effective volume is within the exact model's approved range. Toule documentation for the NTSA-60 and NTSC-60 family identifies 6 kW heating output and a room-volume range, but the installed model and supplied manual should control every decision.
The standard heater can produce authentic traditional heat when room sizing, stones, power supply, ventilation, and insulation are correct. A 6 kW label should not be interpreted as a guarantee of a particular warm-up time across every cabin. Panoramic glass, frequent door opening, wind exposure, or a high ceiling can consume the heater's available reserve.
HUUM DROP 6 kW Upgrade
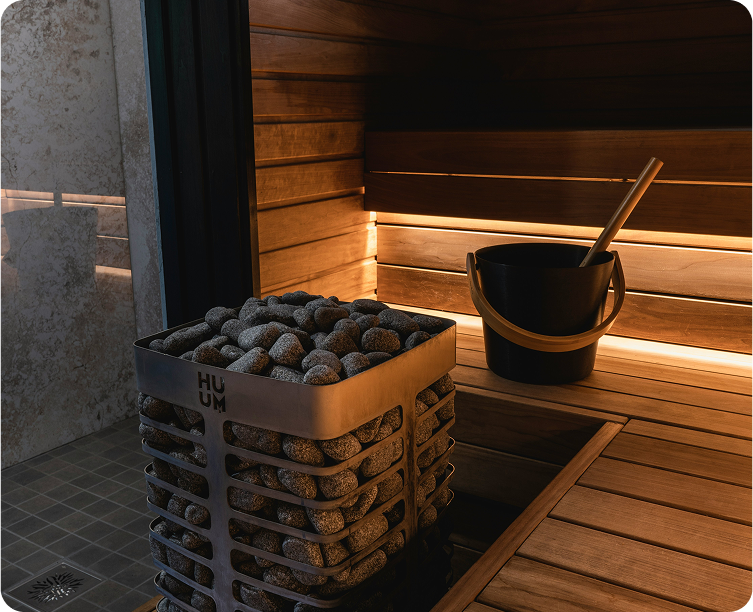
The HUUM DROP 6 kW uses a large exposed stone mass and a wall-mounted sculptural format. Within its approved room range, it can deliver a softer, stone-forward steam experience while providing the same nominal 6 kW electrical output as another 6 kW heater. Equal kilowatt ratings do not make heaters feel identical because stone quantity, element exposure, airflow, controller logic, and room design influence the session.
Greater stone mass generally requires enough preheat for the stones—not only the air—to become ready for water. Owners who enter as soon as the controller reaches its target may not experience the same steam quality as those who allow the system to stabilize. Stone placement must follow HUUM instructions so elements are supported and airflow remains correct.
HUUM DROP 9 kW Upgrade
The HUUM DROP 9 kW provides additional capacity for approved larger rooms or configurations with greater calculated heat loss. In an appropriately matched sauna, that reserve can improve cold-weather warm-up and recovery. It does not mean the room should be operated hotter than a 6 kW sauna, nor does it mean a 9 kW unit belongs in every small cabin.
Heater sizing must respect both the minimum and maximum room volumes. Installing a 9 kW heater in a room below its approved minimum can create control, clearance, and comfort problems. It also changes electrical demand and may require different breakers, conductors, contactors, and service planning. A licensed electrician should use the exact North American or regional documentation supplied with the system.
Wi-Fi UKU Controller
Rodeo's HUUM upgrades pair the DROP heater with the Wi-Fi UKU controller. The controller provides convenient temperature setting, scheduling or remote-start functions where enabled, and system monitoring. It does not compensate for an undersized heater, poor insulation, incorrect sensor placement, or a blocked ventilation system.
Remote operation requires the complete safety installation specified for the market, including any required door sensor and on-site readiness checks. The sauna must never be used for storage, drying towels, or holding objects near the heater. Before starting remotely, the user must be confident that clearances are unobstructed and the cabin is ready for operation.
A correct heater decision accounts for more than nominal power:
-
Effective room volume: Add the manufacturer-required allowance for glass, masonry, logs, or other uninsulated surfaces.
-
Approved sizing range: Keep the completed room between the minimum and maximum volume for the exact heater model.
-
Stone system: Use the specified stone type, quantity, size, condition, and arrangement without blocking required airflow.
-
Electrical design: Match voltage, current, breaker, conductor, controls, grounding, disconnecting means, and service capacity.
-
Cold-weather reserve: Consider outdoor exposure and recovery needs without treating oversizing as a cure for construction defects.
How Outdoor Climate Changes Performance
An outdoor sauna loses heat through its walls, roof, floor, glass, door gaps, and ventilation. The colder and windier the surroundings, the larger the temperature difference across the shell and the faster heat escapes. A capable system can still reach traditional temperatures, but more of its output is used to warm the structure and replace losses during preheat.
The first winter session after several unused days can take longer because every board, bench, stone, and fastener begins cold. Once the air reaches the target, those materials may continue absorbing energy. Owners should expect warm-up to vary by season rather than assuming a fixed app timer applies throughout the year.
Rain and humidity can also influence the process when moisture enters wood or ventilation is poorly managed. The heater must evaporate that moisture while warming the room. Proper roof protection, drainage, drying, and door seals therefore affect both longevity and heating performance.
Cold Starts
In freezing weather, allow additional time and evaluate the cabin after it has stabilized. A controller reaching setpoint does not prove the lower benches, floor, or stones are equally warm. Use a consistent routine and track ambient temperature, start time, setpoint, and ready time to establish realistic seasonal expectations.
Do not obstruct vents or wrap the cabin with temporary combustible insulation to accelerate heating. Any cold-weather modification must preserve the listed clearances, ventilation design, moisture drying, electrical access, and manufacturer requirements.
Wind Exposure
Wind increases heat loss through air leakage and cold glass, especially on exposed lots. It can also create pressure differences that alter ventilation. A sheltered site or correctly detailed wind barrier may improve performance, but screening must not block vents, trap moisture, or violate heater and building clearances.
Check door alignment and gaskets seasonally. Foundation movement, swelling wood, or hardware changes can create gaps that are small visually but significant during a windy winter preheat.
Hot Summer Conditions
Warm outdoor air reduces the initial heating load, so the sauna may reach its control setpoint faster. The system should still cycle according to its sensor and controls. Owners should not assume a shorter warm-up means the stones are fully heat-soaked; steam quality remains a useful practical check.
Summer sun can heat exterior walls and panoramic glass before the heater starts. Ventilate the cabin appropriately after use, protect controls within their approved environments, and avoid treating solar gain as a substitute for normal heater operation.
Insulation Air Sealing and Glass
Insulation slows heat flow, while air sealing controls unintended drafts. Both are necessary. Thick insulation cannot overcome a poorly fitted door, open construction gaps, or wind washing through wall cavities. Conversely, an airtight room without correctly designed ventilation can produce stale air, uneven heat, and sensor problems.
The roof and ceiling deserve particular attention because the hottest air sits near them. Continuous insulation, a correctly installed vapor-control layer, sealed penetrations, and properly detailed cladding help keep heat in the room while allowing the structure to manage moisture as designed. Field modifications should follow the sauna manufacturer's assembly instructions.
Panoramic glass is an aesthetic tradeoff rather than a defect. It delivers views and daylight but increases calculated heat loss. Buyers should compare the finished glass area, not only cabin floor dimensions, when choosing between 6 kW and 9 kW options.
Door Fit
Every door opening releases hot air, and an exterior door that does not close consistently can prevent stable performance. Confirm hinge adjustment, magnetic or roller catch operation, clearances, and weather-related wood movement. Never add a locking device that could trap a person inside.
During group sessions, organize towels, water, and cooling so users do not leave the door standing open. A properly sized heater should recover from normal entry and exit, but repeated long openings can make any compact sauna feel underpowered.
Vapor and Moisture Control
The hot side of an insulated sauna assembly must be detailed for the intended design. Gaps around lights, sensors, vents, and conduit can leak warm moist air into cavities. That leakage wastes heat and can create condensation where vapor reaches cold exterior layers.
Owners should not puncture interior finishes casually to add accessories. Coordinate fasteners and penetrations with framing, clearances, wiring, and moisture-control layers.
Thermal Bridges
Framing, fasteners, window edges, floor connections, and structural transitions conduct more heat than insulated cavities. A few thermal bridges are normal, but extensive uninsulated framing or poorly detailed joints can create cold surfaces and condensation. Professional assembly quality matters as much as the nominal insulation rating.
Investigate the enclosure when performance is inconsistent:
-
Door leakage: Look for visible gaps, wind movement, alignment changes, or hardware that prevents complete closure.
-
Ceiling losses: Verify the specified insulation and vapor-control details around the hottest part of the room.
-
Glass allowance: Confirm that every door and window was included in the effective-volume calculation.
-
Moisture intrusion: Check roofing, flashing, drainage, wet wood, and drying practices before blaming the heater.
-
Unapproved changes: Remove or professionally review added fans, vents, insulation, screens, and penetrations that alter the tested design.
Ventilation and Heat Distribution
Sauna ventilation is not simply an opening that lets cold air in. Correct supply and exhaust placement support breathing comfort, heater operation, heat circulation, and post-session drying. The required arrangement depends on whether ventilation is natural or mechanical and on the heater model.
Poorly placed supply air can cool the temperature sensor, causing the controller to receive misleading information. Harvia specifically warns that the sensor must be installed in the model-defined location and that supply airflow must not interfere with it. Its current general guidance gives example minimum distances for certain vent types, but the exact heater manual remains controlling.
Closing vents to make the sauna hotter can produce stale air and uneven conditions. Adding a fan without design review can create excessive exhaust, negative pressure, or a draft across the sensor. Temperature and air quality should be solved together.
Supply Air
The supply introduces replacement air and can support circulation around the electric heater when located as specified. If it blows directly on a wall sensor, the heater may run longer than intended. If it is too remote or restricted, bathers may experience heavy air and poor mixing.
Exhaust Air
The exhaust removes air and helps establish a circulation path. Its position and flow rate affect the temperature gradient. Mechanical exhaust that is too powerful can pull out heat faster than the heater replaces it, while an undersized or closed exhaust can reduce air quality.
Drying Ventilation
After bathing, the cabin needs a drying routine appropriate to its design. Residual heater heat, open or adjusted vents, and a temporarily open door may help moisture leave. The objective is to dry benches and surfaces without sending large amounts of moisture into concealed assemblies.
Temperature Sensor Placement and Calibration
The temperature sensor is one of the most consequential small components in the sauna. It tells the control system when to energize or cycle the heater and often incorporates or works with overheat protection. Its location is model-specific, determined by heater position, ceiling geometry, ventilation, and manufacturer testing.
Harvia's installation guidance states that an incorrectly positioned sensor can contribute to overheating, poor heating performance, or premature wear. The company also notes that corners, doors, glass, windows, and supply-airflow paths can distort readings. HUUM and Toule systems likewise require their own specified sensor placement; instructions should never be blended across brands.
If the displayed temperature differs from a bench thermometer, first confirm instrument accuracy and location. A modest calibration feature, where the manufacturer allows it, is meant to reconcile expected measurement differences—not to defeat safety limits or compensate for incorrect installation.
Sensor Too Close to Cool Air
A sensor cooled by a supply vent, door leak, or glass surface may report a temperature below the actual hot-zone condition. The controller can then keep the heater energized, increasing ceiling and heater-area temperatures. This is a safety concern, not simply an inaccurate display.
Sensor in an Abnormally Hot Location
A sensor in a hot corner, too close to the heater, or at the wrong ceiling point may reach setpoint early. The heater cycles off while the upper bench remains cooler than expected. Owners sometimes respond by increasing the setpoint, which masks rather than corrects the installation problem.
Independent Thermometer Placement
A separate thermometer is useful for understanding comfort when mounted near the upper-bench head zone and away from direct heater radiation, drafts, doors, and glass. It should not be used to control or modify the heater unless it is an approved part of that control system.
Record readings only after sufficient stabilization. Compare the controller, bench thermometer, ambient outdoor temperature, and elapsed time across several sessions. Consistent differences are more informative than one isolated reading.
A sensor review should confirm each of these points:
-
Exact model instructions: Use the diagram supplied for the installed heater and controller, not a generic internet illustration.
-
Heater relationship: Measure the specified horizontal and vertical position relative to the heater and ceiling.
-
Vent separation: Ensure supply airflow cannot cool the sensor contrary to manufacturer requirements.
-
Door and glass influence: Avoid unapproved placement where drafts or cold surfaces distort the reading.
-
Safety integrity: Never move, cover, bypass, or recalibrate a sensor beyond approved instructions to force additional heat.
Warm-Up Time and Realistic Expectations
Warm-up time begins when the heater starts, but readiness is subjective. One owner may enter when the upper bench reaches 160°F; another waits for 180°F and fully heated stones. A fair performance comparison must use the same target, thermometer location, outdoor temperature, door behavior, and starting condition.
For many compact, correctly built electric outdoor saunas, 30 to 60 minutes is a reasonable planning range in moderate weather. Cold starts, glass-heavy cabins, larger rooms, high targets, dense stone systems, and heaters near the upper edge of their capacity can require longer. Manufacturer claims and app estimates should be interpreted within their stated test conditions.
The last part of preheat is often slower because heat loss increases as the interior-to-exterior temperature difference grows. The heater may raise the first 100 degrees relatively quickly, then take longer to add the final increment while the shell and ventilation continuously release energy.
Air Temperature Versus Session Readiness
Air has low thermal mass and can heat before the benches and stones. If the room feels sharp, surfaces remain cool, and water produces weak steam, allow more stabilization rather than simply raising the thermostat. A settled sauna feels more even and recovers more gracefully.
Recovery After Door Opening
Opening the door replaces hot air quickly, but the heated wood and stones help restore conditions. A correctly sized heater should recover from normal use. Long or repeated openings during group sessions can extend recovery, particularly in a small cabin exposed to winter wind.
Recovery After Water
A ladle of water cools the stone surface temporarily as it turns to vapor. A generous stone mass can provide repeated steam, but it still needs time and power to recover. Pouring excessive water faster than the stones can evaporate it does not improve heat and may send water where it does not belong.
Troubleshooting a Sauna That Does Not Get Hot Enough
A sauna that seems cool should be diagnosed systematically. Confirm the target and measurement point first, then check operating procedure, heater sizing, electrical delivery, stones, ventilation, sensor installation, door closure, and enclosure condition. Randomly changing several variables makes the cause harder to identify.
Electrical diagnosis belongs to a qualified electrician or authorized service provider. A heater may energize partially if an element, connection, control output, or supply issue is present. Because the unit can still produce some heat, owners may mistake a component problem for winter performance.
Do not bypass controls, extend timers unofficially, cover sensors, or alter limit devices. These actions can create fire, shock, and hyperthermia hazards and may invalidate certifications or warranties.
Check Room and Heater Match
Recalculate interior dimensions and all uninsulated surfaces using the exact manual. Include glass doors, panoramic panels, masonry, and any design changes made after purchase. Compare the result with both limits of the heater's approved range.
Check Stones
Stones can settle, fracture, and collect debris over time. If packed too tightly, they restrict airflow; if placed incorrectly, elements may be exposed or inadequately supported. Allow the heater to cool completely and follow the manufacturer procedure for inspection and restacking.
Check Electrical Operation
Have the electrician verify supply voltage under load, current draw, elements, connections, controls, contactors, conductor sizing, and service conditions. A homeowner should not open energized equipment or assume that a breaker remaining on proves full output.
Check Sensor and Ventilation
Compare the installed sensor and vent locations with the model-specific diagrams. Look for later changes such as a new fan, redirected diffuser, shelving, or decorative cover. Correct the system design rather than offsetting it with a higher setting.
Check Air Leakage and Moisture
Inspect the door, window perimeters, penetrations, roof, walls, and floor connections. Wet wood, wind leakage, and missing insulation can consume heater capacity. These defects often appear more clearly in cold or stormy weather.
Document the problem before requesting service:
-
Conditions: Record outdoor temperature, wind, starting cabin temperature, and whether materials were wet or frozen.
-
Timeline: Note start time, controller setpoint, displayed temperature, bench reading, and stabilization time.
-
Usage: Record door openings, number of bathers, water application, and any remote-start sequence.
-
Installation: Photograph heater, stones, sensor, vents, door gaps, glass, and controller without opening electrical enclosures.
-
Equipment: Provide exact heater, controller, voltage, room dimensions, glass area, and installation documentation to support.
Frequently Asked Questions
How Hot Does an Outdoor Sauna Get
A properly designed traditional outdoor sauna commonly operates around 160°F to 195°F at the upper bench. Some approved systems and experienced users operate outside that range, but equipment instructions, sensor location, and individual tolerance control the practical limit.
Can an Outdoor Sauna Reach 200°F
Many traditional electric saunas can approach 200°F under suitable conditions, but that temperature is not guaranteed or necessary. The heater, controller, local requirements, room construction, and measurement location determine capability.
What Is the Best Temperature for a Sauna
There is no single best temperature. Many users prefer 160°F to 190°F, while beginners often start lower. Comfortable humidity, stable heat, session length, and personal response matter as much as the setpoint.
How Long Does an Outdoor Sauna Take to Heat
A compact, correctly matched electric sauna often needs about 30 to 60 minutes in moderate conditions. Cold weather, glass, room size, stone mass, target temperature, and construction can extend that time.
Does an Outdoor Sauna Get Hot in Winter
Yes. Proper heater sizing, insulation, air sealing, ventilation, and door fit allow traditional temperatures in cold weather. Expect longer preheat and greater sensitivity to wind and door openings.
Is a 6 kW Heater Hot Enough
A 6 kW heater can deliver full traditional sauna temperatures when the effective room volume falls within the exact model's approved range. Glass and other uninsulated surfaces must be included in the calculation.
When Is a 9 kW Heater Better
A 9 kW heater may suit an approved larger room or one with greater calculated heat loss. It can offer more recovery reserve, but it should not be installed in a room below the manufacturer's minimum volume.
Does a 9 kW Heater Make the Sauna Hotter Than a 6 kW Heater
Not necessarily. Both can reach the selected operating temperature in correctly matched rooms. The 9 kW model provides more output for a larger load; controls and room design determine the final temperature.
Why Does the Controller Read Hotter Than My Thermometer
The controller sensor is often higher and closer to the hottest zone, while a comfort thermometer may be at bench height. Location, drafts, glass, calibration, and instrument accuracy create legitimate differences.
Can I Move the Temperature Sensor Lower
Only if the exact manufacturer instructions authorize that position. Moving a sensor to force more heat can cause overheating, improper cycling, equipment damage, and loss of safety protection.
Does Water on the Stones Raise the Temperature
It mainly raises perceived heat by increasing humidity. The air-temperature reading may change little, and the stone surface temporarily cools as water evaporates.
Why Are My Feet Cooler Than My Head
Saunas have a vertical temperature gradient. Hot air gathers near the ceiling, so low benches leave the feet in cooler air. Bench and foot-platform height strongly affect comfort.
Does Panoramic Glass Make a Sauna Colder
Glass increases heat loss and can lengthen warm-up, especially in winter. Correct effective-volume calculations and heater sizing compensate for the design within approved limits.
Should I Close the Vents to Get More Heat
No. Ventilation is part of safe, comfortable operation and may be integral to sensor accuracy. Follow the sauna and heater ventilation plan rather than blocking vents.
Can Wi-Fi Controls Preheat the Sauna
The Wi-Fi UKU controller can support remote functions where correctly configured and permitted. Required safety devices and an unobstructed, ready cabin remain essential before remote starting.
How Do I Know When the Sauna Is Ready
Use a consistent bench-level temperature, stable controller cycling, warmed benches, and effective steam from a modest amount of water. The first appearance of the setpoint may be too early.
Why Is Warm-Up Slower After Rain
Wet wood and higher moisture loads absorb energy, while wind and cool conditions may increase shell losses. Check weather protection, drainage, drying, and air leakage if the difference is substantial.
Can I Use an Infrared Thermometer
It can compare surface temperatures but does not measure air temperature. Emissivity, reflective metal, glass, distance, and angle affect readings, so it should not replace the approved control sensor.
What Temperature Is Too Hot
Any condition that exceeds equipment limits, local requirements, or a user's safe tolerance is too hot. Exit immediately for concerning symptoms and never pursue a number at the expense of comfort or safety.
How Often Should the Heater Stones Be Checked
Follow the heater manufacturer's schedule and inspect sooner if steam weakens, warm-up changes, stones crumble, or airflow appears restricted. Allow the heater to cool fully before approved maintenance.
Editorial Review and Primary Sources
This article was reviewed against current manufacturer guidance on October 8, 2026. Temperature capability, approved room volume, control limits, sensor placement, electrical requirements, and safety devices vary by model and market. Use the documentation supplied with the exact installed equipment and obtain qualified electrical installation and service.
Harvia guidance on traditional sauna temperature ranges
Harvia temperature sensor installation guidance
Harvia sauna ventilation guidance
HUUM DROP North American installation and operating manual
Toule NTSA and NTSC heater installation manual
Internal Linking Note
Link this guide to electric versus wood-burning heaters, HUUM versus Harvia, Wi-Fi sauna heaters, panoramic glass, outdoor sauna insulation, electrical requirements, ventilation, maintenance, and heater sizing. Keep this page focused on achievable temperatures and performance expectations to avoid cannibalizing model-comparison and installation pages.
Final Thoughts
The practical answer to how hot does an outdoor sauna get is usually about 160°F to 195°F at the upper bench for traditional residential use, with broader capability depending on the approved equipment and setting. The most satisfying session is not necessarily the one with the highest display. Stable heat, warm benches, hot stones, controlled ventilation, and responsive steam produce a better experience than a brief temperature peak.
Outdoor climate affects how quickly the cabin reaches that condition, not whether a well-designed sauna can provide authentic heat. Correct heater sizing, glass adjustments, ceiling insulation, air sealing, ventilation, door fit, stone arrangement, and sensor placement determine whether the system performs consistently through the seasons.
Treat temperature differences as a measurement and design question before assuming a defect. Identify where every sensor and thermometer is located, allow the room to stabilize, document outdoor conditions, and compare the completed cabin with the exact heater instructions. Never move safety sensors or exceed approved settings to chase a number.
Our Recommendation
For most owners, begin around 160°F to 175°F at the upper-bench comfort zone and adjust gradually based on humidity, session length, and personal response. Allow enough preheat for the stones and benches to become ready, then use modest amounts of water to shape the experience. Consistency and comfort are better buying criteria than maximum advertised temperature.
Choose the heater only after calculating effective room volume, including panoramic glass and other uninsulated surfaces. Rodeo Wellness configurations using a Toule or Harvia 6 kW heater can provide traditional sauna temperatures when correctly matched. The HUUM DROP 6 kW upgrade offers a stone-forward experience within its approved room range, while the HUUM DROP 9 kW is appropriate when the completed load and manufacturer sizing genuinely call for more capacity.
For HUUM upgrades with the Wi-Fi UKU controller, have the installer document the heater model, regional electrical requirements, room calculation, stone loading, sensor and door-safety arrangement, ventilation, and remote-start procedure. The best outdoor sauna is one that reaches a comfortable, repeatable temperature safely in the owner's real climate—not one modified to produce the largest number on a screen.



 OUR BEST SELLERS